Introduction: Measurement & Detection in Fluid-Based Industrial Systems
Measurement & Detection failures in fluid-based systems—including expansion tanks, pressure transmitters, and flow monitoring equipment—represent some of the most costly downtime issues in Singapore's industrial sector. Whether managing HVAC infrastructure, compressed air systems, or process heating applications, accurate pressure and flow measurement is critical to operational safety and efficiency.
At 3G Electric, our 35+ years of equipment distribution experience has revealed that most Measurement & Detection failures stem not from sensor malfunction, but from improper installation, calibration drift, or fluid contamination. This troubleshooting guide addresses the diagnostic challenges you'll encounter with expansion tank inflatables, differential pressure transmitters, RTD temperature probes, mechanical pressure gauges, and flow measurement devices commonly deployed across Singapore's industrial landscape.
Section 1: Expansion Tank Inflator Battery Failure and Pressure Loss Diagnostics
Common Failure Modes
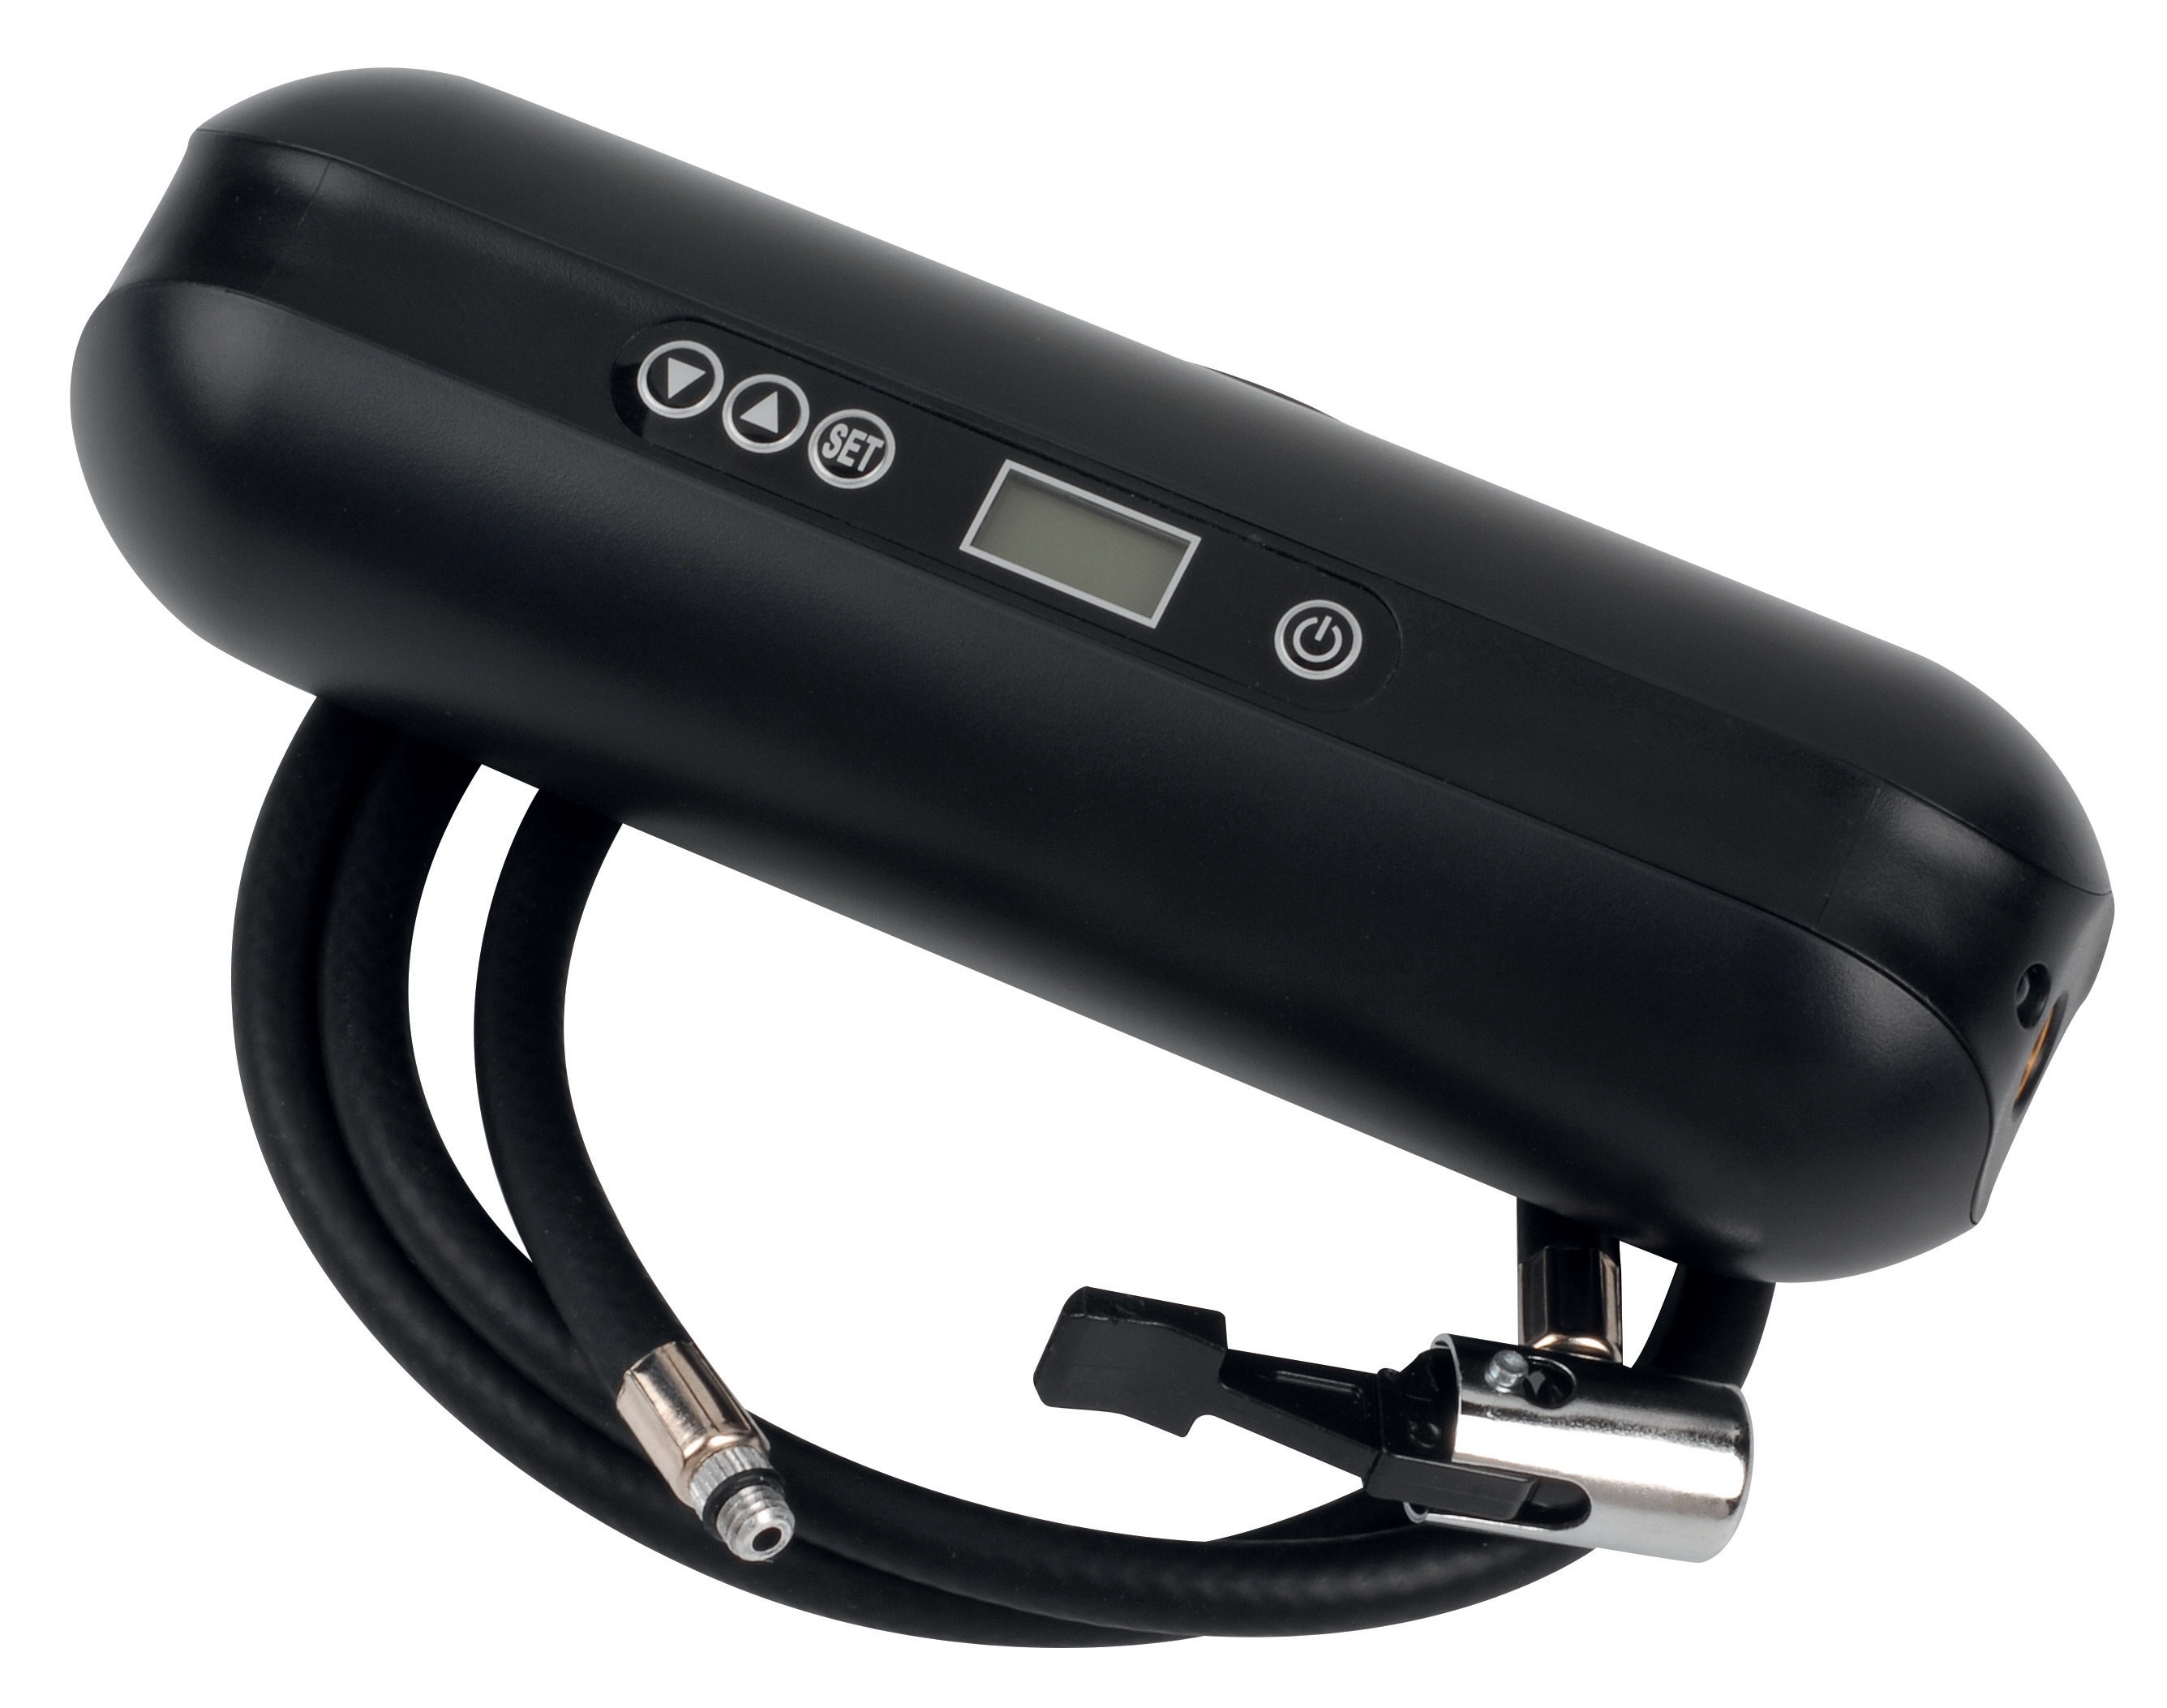
Expansion tank inflatables like the CBM Expansion Tank Inflator Battery 2000 mAH are designed to pre-charge closed-loop heating and cooling systems. Battery-powered inflatables encounter three primary failure categories:
Battery Depletion Without Pressure Delivery: The device powers on, displays charge indicators, but fails to inject air into the tank. This typically indicates a dead internal battery, pressure release valve malfunction, or blocked air passage. The 2000 mAH capacity assumes moderate use (4–6 inflations per charge cycle). Excessive humidity in storage or exposure to temperature extremes (below -20°C or above 60°C) rapidly degrades lithium battery performance.
Inability to Achieve Target Pressure: The inflator operates but reaches only 60–70% of the desired pressure (typically 1.5–2.5 bar for closed HVAC systems) before stalling. Root causes include: leaking check valve, damaged gasket on the tank connection interface, or battery insufficient to reach the system's static pressure. The CBM device is rated to 10.3 bar maximum—exceeding this specification creates back-pressure that exhausts the battery without completing inflation.
Intermittent Operation After Extended Storage: Inflators stored for 6+ months in uncontrolled warehouse conditions exhibit erratic behavior. Internal moisture corrosion damages battery terminals and valve seals.
Diagnostic Procedure
Step 1: Battery Assessment
- Connect the device to a USB charger for 4 hours minimum
- Listen for an audible charging indicator or observe LED status
- If no response after 6 hours of charging, the internal battery is failed and the unit requires replacement
- Disconnect from the expansion tank
- Activate the inflator over a bucket of water (creates backpressure)
- Observe for air bubbles emerging. If none appear within 10 seconds of operation, the valve is stuck or battery is insufficient
- Inspect the barbed connection interface for corrosion, mineral deposits, or visible damage
- Attach a pressure gauge temporarily to isolate whether failure is in the inflator or tank connection
- Apply thread sealant tape (PTFE) to all connections if mineral deposits are visible
- Measure the expansion tank's current pressure using a mechanical gauge
- Document the reading. For HVAC systems, pressure should be 85–90% of the system's minimum operating pressure
- If pressure is 0 bar (completely evacuated), the tank has a slow leak or prior rupture
Real-World Scenario: Singapore Tropical Humidity Issue
A maintenance team in Jurong industrial estate reported that three CBM inflatables failed to operate after a 3-month monsoon period. Despite successful pre-charge testing, devices powered on but produced no air output. Root cause: condensation inside the battery compartment corroded the connection terminals. Solution: Ensure devices are stored in sealed, desiccant-equipped enclosures with humidity below 60%. Battery replacement is required once terminal corrosion occurs.
Section 2: Differential Pressure Transmitter Signal Loss and Calibration Drift
Measurement & Detection Transmitter Failure Patterns
The Dwyer 616KD-13V-TC Differential Pressure Transmitter is a workhorse in HVAC control systems, measuring pressure differentials across filters, dampers, and heat exchangers. Signal loss or accuracy drift at this component cascades into control system failures that prevent damper actuation, fan speed modulation, and system balancing.
Signal Loss (0 mA Output or No Response to Pressure Change)
This occurs when the transmitter reads 0–4 mA (or 0 mV on loop-powered systems) regardless of applied pressure. Causes include:
- Barbed process connection blockage (dust, sealant tape fibers, frozen condensate)
- Sensor membrane rupture from overpressure or thermal shock
- Failed internal electronics or power supply
- Wiring disconnection or corrosion at terminal blocks
The transmitter responds to pressure changes but reads 20–30% high or low. This indicates calibration drift due to:
- Sensor membrane creep (elastomer fatigue after 2–3 years)
- Residual pressurization in the reference side (vent line blockage)
- Temperature coefficient error (outdoor sensors experiencing -5°C to +45°C swings in Singapore)
The sensor detects pressure changes but with significant delay. Causes: air bubbles trapped in tubing, kinked or blocked impulse lines, sensor response time exceeding the 150 ms specification at full accuracy.
Diagnostic Procedure
Step 1: Visual Inspection and Connection Verification
- Trace both barbed connections (high and low pressure ports) from the transmitter to the system
- Look for kinks, crushing damage, or disconnection at either end
- For compressed air systems: verify that pressure is being applied to the HIGH port and atmospheric reference (or differential measurement point) to the LOW port
- Correct polarity is essential—reversed connections produce inverted, negative, or zero output
- Disconnect the barbed tubing at the transmitter connection points (have a rag ready for pressure release)
- Apply controlled air pressure (2–3 bar) through each line to dislodge blockages
- Listen for clear air flow. Gurgling indicates moisture or debris inside the tubing
- Repeat purging 2–3 times per line, then allow 30 seconds drainage time
- Reconnect and retest
- With the transmitter powered and wired to a multimeter or controller display, manually apply known pressures to the high port (keep low port vented to atmosphere)
- Apply: 0 mbar (baseline), 25 mbar, 50 mbar, and maximum rated pressure (1 IN W.C. = 24.9 mbar for this model)
- Record the mA output at each step. Output should be linear: 4 mA at 0 mbar, 20 mA at 1 IN W.C.
- If output is nonlinear or zero across all pressures, the sensor membrane is likely ruptured
- Outdoor transmitters drift significantly in tropical climates due to -35°C to +65°C sensor swings (indirect, through HVAC discharge)
- Obtain the transmitter's temperature coefficient specification (typically ±0.1% per °C)
- If temperature swings exceed 20°C between day and night, recalibration every 6 months is required
- Install shielding (foam insulation or radiant barrier) around outdoor sensor housings
- Power the transmitter with 12–24 VDC and no pressure applied
- Measure output voltage/current at the transmitter's output terminals
- Expected: 4 mA (or proportional voltage) with zero pressure
- If output is erratic (fluctuating 2–6 mA) or exceeds 20 mA at zero pressure, internal electronics are failing
- Replacement is necessary; repair is not economical
Real-World Scenario: Singapore High-Rise HVAC Balancing Issue
A 45-story office building's Measurement & Detection system reported inconsistent pressure readings across 12 floor-mounted transmitters. Some read 40 mbar (filter clogged indicator), others read 5 mbar (filter clean). Investigation revealed that tubing was installed with kinks above the 25th floor, trapping air bubbles. Additionally, three transmitters were mounted directly in sunlight without shielding, causing thermal drift. Solution: Rerouted tubing with 5 cm minimum bend radius, installed reflective shielding on outdoor sensors, and recalibrated all units. Pressure readings normalized within 2 hours.
Section 3: Temperature Probe Accuracy Loss and Installation Faults
RTD Probe Failure Modes
The Dwyer PT100 OHM RTD Temperature Probe is the industry standard for industrial process measurement, offering ±0.6% accuracy and wide temperature range (-35.5 to +115.5°C). However, three specific failure modes create false temperature readings that corrupt process control logic:
Accuracy Degradation (±1.5–2% Instead of ±0.6%)
The probe continues to respond to temperature changes but with reduced precision. This indicates:
- Sensor resistance drift due to physical stress on the platinum element (vibration damage, mechanical shock)
- Lead wire corrosion or high-resistance connections at terminal blocks
- Insertion depth into the process: if the probe tip is only 1 cm inside the pipe, it reads ambient temperature rather than process fluid temperature
The sensor reads a fixed resistance value (often 0 ohms or open circuit). Causes:
- Lead wire fracture at the strain relief or flange connection
- Corrosion/oxidation on the RTD element rendering it open-circuit
- Water ingress into the probe's protective sheath (for exposed installations)
The probe eventually reaches the correct temperature but with significant delay. Causes:
- Poor thermal contact between probe and process (if mounted in air rather than immersed)
- Oversized thermowell that isolates the probe from the process temperature
- Probe sheath fouling (mineral scale, corrosion product) that insulates the RTD element
Diagnostic Procedure
Step 1: Installation Verification
- Verify that the probe's sensing length extends at least 5 cm into the process fluid (not just touching the surface)
- Check that the copper capillary tubing (flexible lead run) is not kinked, crushed, or submerged in water that would corrode the copper
- Inspect the flange clip mounting: the probe should be held rigidly without movement or vibration
- For thermowell applications: confirm that the probe is fully inserted into the well. A gap between probe tip and well bottom = dead air space that insulates the sensor
- Disconnect the probe from the controller at the terminal block
- Set the multimeter to OHM measurement (resistance mode)
- Measure resistance between the two lead terminals
- At 0°C (ice water reference), a PT100 probe should read exactly 100 ohms
- At 25°C (room temperature), resistance should be approximately 110 ohms
- At 50°C (warm water), resistance should be approximately 120 ohms
- If resistance is 0 ohms (short circuit) or exceeds 500 ohms (open circuit), the probe element has failed and requires replacement
- If resistance is within 2–3 ohms of the expected value, the probe is functioning but may have accuracy drift
- Prepare an ice water bath (0°C) and a warm water bath (50°C) using thermometers for reference
- Submerge the probe fully into the ice bath for 2 minutes
- Record the controller's temperature reading
- Compare to the reference thermometer. Error should be ≤±1°C (±0.6% of typical industrial process ranges)
- Repeat with warm water bath
- If error exceeds ±2°C across both tests, recalibration is required or the probe is drift-failing
- Trace the copper capillary tubing from the probe to the terminal block
- Visually inspect for: corrosion (green patina), kinks, pinch damage, or water pooling
- If corrosion is present, the probe must be replaced (repair is not reliable)
- Use a multimeter to test continuity between each lead and the flange body (should be open circuit for safety)
- If continuity exists (0 ohms), the lead is shorted to the flange, creating erroneous readings
- Submerge the probe in room-temperature water
- Rapidly move it to 50°C water
- Measure the time for the controller reading to stabilize at the new temperature
- Response time should be 10–15 seconds for a fully immersed probe in flowing process fluid
- If response time exceeds 30 seconds, the probe is fouled or poorly installed
Real-World Scenario: Singapore Process Cooling Tower Temperature Drift
A manufacturing plant's chilled water temperature controller failed to maintain setpoint, causing product quality issues. Temperature readings fluctuated ±3°C despite stable process conditions. Three RTD probes were mounted in thermowells that were only 2 cm deep—the probes were reading ambient air temperature above the water line. Solution: Extended the thermowell insertion depth to 10 cm below the water surface, recalibrated all three probes with an ice bath reference, and adjusted the controller's response time to 20 seconds. Temperature stability improved to ±0.5°C.
Section 4: Pressure Gauge Calibration, Mechanical Failure, and Flow Probe Integration Issues
Mechanical Pressure Gauge Reliability
The Preciman Stainless Steel Vertical Pressure Gauge D63 0/+40 mbar provides direct visual indication of system pressure, often serving as a backup to electronic Measurement & Detection transmitters. However, mechanical failures are common in Singapore's corrosive industrial environments:
Accuracy Loss (Dial Reading ±2–3% When Specification is ±1.6%)
The needle moves but indicates pressure outside acceptable tolerance. Causes:
- Internal Bourdon tube elastomer fatigue (after 5+ years of operation)
- Corrosion of the Bourdon tube interior from saturated air or condensate
- Mechanical pointer friction or calibration spring loosening
- Overpressure event (even brief exposure to 1.5× rated pressure) permanently deforms the Bourdon tube
This indicates internal friction or debris inside the gauge mechanism. Causes: corrosion particles, gauge shock, or internal bearing wear. The gauge may read low pressure correctly but jump suddenly when pressure increases 2–3 mbar. This is a safety concern if the gauge is the sole pressure monitoring device.
Slow Needle Response or Hysteresis (Reading Depends on Whether Pressure is Increasing or Decreasing)
This indicates a deteriorated internal seal or significant friction. Untrustworthy for control system input.
Diagnostic Procedure
Step 1: Visual Inspection
- Check the gauge case for cracks, bulging, or corrosion (stainless steel may show pitting or discoloration)
- Inspect the connection (G1/4 NPT thread) for leaks, corrosion, or mineral scale
- Verify that the mounting is rigid and vertical (tilted gauges read incorrectly)
- Look at the dial: if the needle is bent or the dial markings are faded, mechanical damage has occurred
- Connect a recently calibrated digital pressure gauge in parallel with the mechanical gauge
- Note readings at multiple pressure points: 0 (atmospheric), 10 mbar, 25 mbar, and 40 mbar (maximum)
- Record the difference between mechanical and digital readings at each point
- Acceptable error: ±0.64 mbar (1.6% of 40 mbar span)
- If error exceeds 1 mbar at any point, the gauge has lost calibration
- Rapidly increase pressure from 0 to 25 mbar using a pump
- The needle should respond within 2–3 seconds
- Decrease pressure rapidly back to 0
- The needle should return to zero within 2–3 seconds
- If the needle lags more than 5 seconds or exhibits hysteresis (reads 5 mbar higher on decrease than increase), the gauge is mechanically degraded
- Inquire whether the system has experienced overpressure events (pump cavitation, thermal expansion spikes, or accidental pressure application)
- If yes, the gauge is suspect regardless of current readings (permanent Bourdon tube deformation may have occurred)
- Replace the gauge as a precaution
Flow Probe Measurement Integration
The Dwyer MAFS-16 Metal Average Flow Probe is integrated into Measurement & Detection systems to monitor HVAC air distribution efficiency. The probe measures static and total pressure across its 16 cm length, with the differential indicating air velocity (and thus flow rate). Integration failures occur when:
Pressure Measurement Disagreement
- The MAFS-16 reports 15 mbar static pressure differential across a duct
- A standalone Dwyer 616KD-13V-TC differential pressure transmitter at the same location reads 8 mbar
- Root cause: the MAFS-16 is partially blocked (dust cake on the probe sensing holes) or thermally stratified air flow is not being sampled uniformly across all 16 cm of probe length
- Solution: Purge the probe with 5 bar compressed air from the reverse direction; ensure probe is mounted perpendicular to air flow and spans the full duct height
- Flow = K × √(ΔP), where K is a system constant dependent on duct geometry and probe placement
- If the MAFS-16 differential pressure is correct but calculated flow rate is 30% lower than expected, the probe constant K requires recalibration
- This occurs when probe is installed at an off-spec distance from duct entrance (should be 5+ duct diameters downstream of any obstruction)
- Singapore's data centers and manufacturing facilities often operate ducts at 10+ m/s air velocity
- The MAFS-16's averaging holes erode and enlarge, causing pressure measurement drift
- Inspect the probe tip under magnification: holes should be sharp-edged and uniform
- If holes are rounded or enlarged, the probe must be replaced (polishing does not restore accuracy)
System Integration Diagnostics
When Measurement & Detection components (transmitter, RTD probe, flow probe, gauge) all report different values:
1. Establish a Primary Reference: Use a recently calibrated handheld tool (digital pressure gauge, thermocouple thermometer) as the ground truth
2. Test Each Component Individually: Apply known inputs (air pressure, ice bath temperature) and record each device's output
3. Map Failure Patterns: If the RTD is accurate but the transmitter is off-scale, the fault is in the transmitter electronics, not the process signal
4. Document Calibration Dates: Traceable calibration (with NIST or ISO 17025 certificate) is critical in Singapore's regulated industries (pharmaceutical, semiconductor, food processing)
5. Implement Preventive Recalibration Schedule:
- Differential pressure transmitters: annually
- Temperature probes: annually or after any thermal shock
- Mechanical pressure gauges: every 2 years if used in critical applications
- Flow probes: inspect quarterly for erosion/blockage
Conclusion: Best Practices for Measurement & Detection Reliability in Singapore Industrial Facilities
Measurement & Detection system failures cascade rapidly through control logic, resulting in process deviations, equipment damage, and safety risks. The diagnostic procedures outlined above—visual inspection, functional testing, reference comparison, and calibration verification—are the foundation of reliable industrial operations.
3G Electric's 35+ years as an equipment distributor across Singapore's industrial sector confirms that most Measurement & Detection failures are preventable through:
- Proper Installation: Correct orientation, adequate immersion, unobstructed tubing, and secure mounting are non-negotiable
- Environmental Protection: Shielding from extreme temperature swings, moisture ingress, and corrosive atmospheres extends component life by 2–3 years
- Scheduled Recalibration: Quarterly inspections and annual calibration (more frequent in harsh environments) catch drift before it impacts control system performance
- Redundant Monitoring: Pairing electronic transmitters with mechanical gauges or dual-sensor configurations provides fault tolerance
- Documented Maintenance: Every intervention (cleaning, calibration, replacement) must be recorded with date, technician name, and baseline readings for trend analysis
For troubleshooting complex multi-sensor systems or technical support in procurement, contact 3G Electric's equipment specialists. We maintain inventory of replacement components, calibration equipment, and installation resources to minimize your facility's downtime.