Understanding Pre-Installation Requirements for Burners & Combustion Systems
Before any installation work begins, HVAC contractors must conduct a thorough site assessment. Burners & Combustion systems in Southeast Asia's tropical climate face unique challenges—humidity, salt air in coastal regions, and temperature fluctuations that affect combustion air quality and component longevity.
Start by documenting the existing boiler or heater specifications: fuel type (gas, oil, or dual-fuel), thermal capacity in kW or Mcal/h, and current control system age. Southeast Asian industrial facilities often operate older equipment, so compatibility becomes critical. Verify power supply stability—voltage fluctuations are common in the region and can damage sensitive control relays if not properly assessed.
Measure combustion air inlet conditions. Poor air supply leads to incomplete combustion, soot buildup, and premature component failure. In humid climates, condensation in fuel lines is a persistent problem. Recommend installing air filtration and fuel polishing systems before burner installation. With 35+ years of experience serving industrial distributors across Asia, 3G Electric has seen how skipping this step leads to costly callbacks within months.
Review local regulatory requirements. Codes vary between countries—Singapore, Malaysia, Thailand, and Indonesia each have different emissions standards and installation protocols. Obtain permits and schedule inspections before work begins.
Installation Sequence: Mechanical and Control Components
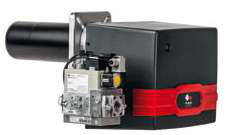
The installation sequence matters significantly when setting up Burners & Combustion systems. Begin with mechanical components: fuel supply piping, combustion air ductwork, and mounting hardware. For two-stage burners like the FBR GAS XP 60/2 CE TC EVO, ensure the nozzle is properly aligned—even 5mm misalignment affects flame geometry and combustion efficiency.
For dual-fuel burners such as the FBR KN 1300/M TL EL, verify fuel changeover valve functionality before electrical work begins. Test oil flow rates independently from gas circuits to prevent cross-contamination. Many callbacks occur because contractors skip this mechanical validation step.
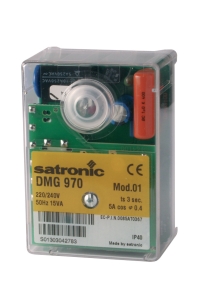
Next, install control components in logical sequence. Mount the burner control relay before connecting sensors. The Kromschroder BCU 570WC1F1U0K1-E relay supports direct ignition and intermittent/continuous pilot modes—ensure you understand which mode your application requires before installation. Review the relay's terminal diagram three times before wiring; electrical errors cause immediate component failures or safety lockouts.
Install the Kromschroder DG 50U/6 pressure switch on the gas supply line ahead of the burner. This SIL 3-rated switch monitors fuel pressure and prevents ignition if pressure is inadequate. Set the adjustment screw to the middle position initially—you'll calibrate it during commissioning based on actual system pressure.
For medium to high-power applications, integrate the Siemens LFL 1.622 safety control unit, which provides redundant flame monitoring using UV and ionization detection. This dual-channel approach meets Southeast Asian safety standards and prevents false lockouts from spurious signals.
Route all sensor and ignition wiring in separate conduit from power lines. Southeast Asia's humid environment accelerates corrosion—use stainless steel conduit and nickel-plated connectors, not mild steel. Seal all conduit entries with silicone or epoxy; water ingress is your biggest enemy in tropical installations.
Commissioning Procedures: Testing and Calibration
Commissioning is where installation quality becomes apparent. Begin with static tests before any ignition attempt. Verify all wiring connections with a multimeter. Check control relay coil voltage—it must match the supply voltage (typically 230V AC or 110V AC in Southeast Asia). Any deviation suggests a transformer problem or loose connection.
Test the pressure switch independently. Apply air pressure to the inlet port using a hand pump while monitoring the switch terminals with a multimeter. The switch should close (show continuity) at the set pressure. For the DG 50U/6, typical setpoints range from 50 to 100 mbar depending on burner type. Document the actual closing pressure—this baseline is critical for future troubleshooting.
Next, perform a fuel flow test without ignition. Open the fuel supply valve and measure flow at the burner outlet using a graduated container and stopwatch. For gas burners, confirm the line pressure stabilizes at the design point. For oil burners, check that the nozzle spray pattern is symmetrical and there are no drips or leaks from the nozzle seat.
Before attempting ignition, verify combustion air flow. Use an anemometer at the air inlet to measure velocity in m/s. Most two-stage burners require minimum air flow of 2-3 m/s to ensure proper mixing and flame stability. Southeast Asian coastal sites often experience strong wind pressures—ensure the air inlet has adequate damping and baffles to stabilize flow.
Now attempt the pilot ignition sequence. Energize the control relay and listen for the ignition transformer to hum (this indicates high-voltage generation). The ignition electrodes should spark visibly—you should see a blue spark at the electrodes. If no spark appears after 5 seconds, immediately de-energize the relay. Do not force repeated ignition attempts; this damages the transformer and control components.
Once pilot ignition is confirmed, introduce pilot fuel (usually gas for dual-fuel systems). You should see a small blue flame at the pilot burner within 2-3 seconds. If the flame doesn't appear after 10 seconds, lockout the relay and investigate. Common causes: fuel isolation valve closed, clogged pilot fuel nozzle, or incorrect nozzle orientation.
After successful pilot ignition, energize the main burner solenoid valve. The main flame should establish smoothly within 5 seconds. Observe the flame color and shape: it should be bright blue with no visible smoke or yellow sections. Any smoke or orange color indicates incomplete combustion—reduce air flow incrementally until the flame turns uniformly blue.
Recalibrate the pressure switch once the burner is running stably. The fuel pressure under full load often differs from static pressure. Adjust the DG 50U/6 setpoint so the switch closes at 10-15% above normal running pressure—this provides margin before the system shuts down.
Run the burner through at least three complete on-off cycles to verify reliable ignition and flame holding. Record the lockout response time (time from flame loss to safety shutdown). It should be less than 5 seconds for SIL 3 systems. If lockout is slow or unreliable, inspect the flame detection electrodes for soot or contamination.
Document all settings in a commissioning record: fuel pressures at idle and full load, air damper positions, ignition voltage, and flame detection signal strength. Give this record to the facility maintenance team—it's invaluable for future troubleshooting.
Post-Installation Support and Regional Considerations
After commissioning, Burners & Combustion systems require prompt follow-up. Schedule a re-visit 2 weeks after startup to check for thermal stress cracks, fuel line leaks, or electrical connector corrosion. In Southeast Asia's humidity, moisture ingress is rapid; sealed connectors must be re-inspected frequently in the first month.
Establish a preventive maintenance schedule with the facility operator. In tropical climates, recommend quarterly inspections instead of the typical semi-annual interval. High humidity accelerates electrode oxidation and insulator degradation; cleaning and replacing flame detection electrodes every 6 months is standard in Southeast Asia, not annual as in temperate zones.
Provide the facility with spare parts compatible with their system: ignition electrodes, fuel nozzles, and gaskets. Stock these items at your service location. When a burner fails during monsoon season, replacement delays cost thousands in lost production.
Stay current with local regulations. Singapore, for example, tightens emissions standards every 2-3 years. Malaysia and Indonesia are moving toward stricter NOx limits. A burner that passed inspection in 2022 may not meet 2024 standards. Build relationships with local regulatory agencies and attend technical seminars to stay informed.
3G Electric's 35+ years serving Asian industrial markets means we've navigated these changing standards alongside contractors and facility managers. Lean on your distributor's regulatory expertise—it's part of the value-add service in this region.
Finally, train facility maintenance staff on basic operation and safety shutdown procedures. Provide written materials in local languages (Bahasa Indonesia, Thai, etc.) alongside English documents. Many accidents occur because operators don't understand the burner's safety features or how to manually shut down the system in emergencies. A well-trained operator prevents problems before they become costly failures.