
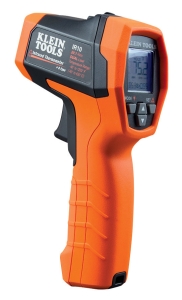
Understanding Measurement & Detection in Hydraulic and Pneumatic Systems
Measurement & Detection equipment forms the critical backbone of hydraulic and pneumatic system control, safety, and efficiency monitoring. For plant managers across Singapore's industrial landscape, understanding how these systems function—and more importantly, how to diagnose failures—directly impacts production uptime and operational costs.
Hydraulic and pneumatic systems rely on three primary measurement technologies: pressure gauges (both mechanical and electronic), flow measurement probes, and pressure switches that trigger automated responses. When any of these components fail or drift, the consequences cascade rapidly: loss of system pressure indication, inability to detect dangerous conditions, erratic control responses, and unplanned shutdown events.
3G Electric's 35+ years of experience distributing industrial measurement equipment across Asia has shown us that 60% of Measurement & Detection failures result not from equipment defects, but from installation misunderstandings, environmental factors, or inadequate maintenance protocols. This guide addresses the most common failure modes plant managers encounter and provides actionable diagnostic procedures you can implement immediately.
Common Failure Modes and Diagnostic Procedures
Pressure Gauge Failures and Inaccurate Readings
Mechanical pressure gauges like the Preciman Manometer ABS vert D80 0/+16bar G1/2 are workhorses in Singapore's industrial plants, but they fail in predictable patterns. The most frequent complaints we hear involve "stuck" needle readings, erratic fluctuations, or complete loss of indication.
Diagnostic Procedure:
When a gauge stops responding to actual system pressure changes, follow this sequence:
1. Isolate the gauge – Close the isolation valve (if installed) between the system and gauge. Many plants omit this critical component, forcing complete system shutdown for diagnosis.
2. Check for blockages – Glycerin-filled gauges like the Preciman accumulate sediment over years of operation. Gently tap the gauge body to dislodge particles. If the needle suddenly moves freely, a blockage was present.
3. Verify gauge calibration – Use a known-good reference pressure source (portable hand pump or system test point) to compare readings. A variance exceeding ±5% indicates the gauge requires recalibration or replacement.
4. Inspect the sensing element – Mechanical gauges fail internally when the Bourdon tube ruptures or the linkage assembly corrodes. If the gauge reads zero under confirmed positive pressure, the sensing element has failed—replacement is the only remedy.
5. Document the failure mode – Record which pressure range experienced the fault (high-end, mid-range, or low-end). This pattern reveals whether the failure was mechanical (widespread across range) or electrical (often concentrated in specific zones).
Common Root Causes in Singapore's Humid Tropical Climate:
High humidity and saltwater proximity accelerate corrosion inside gauge housings. Gauges without proper IP65 sealing develop internal condensation that freezes the mechanical components. Always specify sealed, glycerin-filled gauges for coastal facilities or high-humidity environments. Replace gauges showing any sign of internal fogging or moisture.
Flow Probe Signal Loss and Inconsistent Readings
Flow measurement probes like the Dwyer MAFS-20 medium flow metal probe provide essential feedback for system balancing and efficiency monitoring. Signal loss occurs when the probe becomes contaminated, the electrical connection corrodes, or the sensing element clogs.
Diagnostic Procedure:
1. Verify power supply – Use a multimeter to confirm 24 VDC is reaching the probe connector. A missing voltage signal eliminates the need for further probe diagnostics; the issue is in the power distribution circuit.
2. Check probe insertion depth – Flow probes measure velocity at their sensing tip. If recently installed or serviced, confirm the probe extends into the flowing medium correctly. Probes installed flush with the interior wall read zero because they sense static conditions.
3. Inspect for sediment blockage – Remove the probe carefully and visually inspect the sensing ports. Silicon-based hydraulic fluids in Singapore's warm climate promote oxidation and varnish deposition. A blocked probe appears dark or sticky. Flush gently with clean hydraulic fluid; do not use compressed air (risk of sensing element damage).
4. Test the transmitter output independently – Disconnect the probe from its transmitter. If the transmitter now shows zero, the probe has failed internally. If the transmitter still shows signal, the failure is in the probe's electrical connector or internal wiring.
5. Monitor trending data – Flow probe signals drift gradually before complete failure. If your system records historical data, examine the trend: steady decline indicates imminent failure, while sudden drops suggest contamination or electrical disconnection.
Installation Best Practice:
Flow probes must be installed in straight, fully-filled pipe sections at least 5 pipe diameters downstream of elbows or tees. Singapore plants often violate this requirement due to space constraints. If your probe shows erratic readings, verify installation location before replacing the equipment.
Pressure Switch Failures and Loss of Alarm Functions
Pressure switches like the Dwyer DXW-11-153-4 are safety-critical devices that initiate emergency shutdowns or activate backup systems. When they fail, you lose alarm indication and potentially expose the system to dangerous overpressure conditions.
Diagnostic Procedure:
1. Perform a manual trip test – Access the switch's test button (if equipped). Pressing it should trigger the connected alarm or interlock immediately. No response means the electrical circuit downstream of the switch has failed, not necessarily the switch itself.
2. Verify setpoint calibration – Use a portable pressure source (hand pump) to slowly increase system pressure while observing the switch response. Record the exact pressure at which the switch contacts close or open. Compare to the equipment nameplate. A variance exceeding the switch's tolerance band (typically ±0.10 bar for precision switches) indicates drift requiring recalibration.
3. Inspect the switch mechanism – Gently remove the switch from the system and visually examine the electrical contacts. Corrosion appears as green or white deposits on brass contacts. Light corrosion can be cleaned with fine sandpaper; heavy corrosion requires replacement.
4. Test the electrical circuit independently – Connect a 24 VDC power supply directly to the switch terminals (following proper polarity). The switch should click audibly when pressure exceeds setpoint. If no click occurs, the internal mechanism has failed.
5. Check for differential band issues – Pressure switches have both setpoint (activation pressure) and differential (reset pressure). If a switch activates at 4.0 bar but doesn't reset until 3.5 bar, the differential band is functioning correctly. Verify your system isn't expecting the switch to reset at the same pressure it activated.
Singapore-Specific Challenge:
Singapore's high ambient temperatures (up to 38°C) combined with compressed air system heat causes pressure switch calibration drift. Switches exposed to direct sunlight or mounted on hot pipe sections drift upward over time. Relocate switches to shaded areas whenever possible, or install thermal insulation blankets around the switch body.
Pressure Transmitter Output Failures and 4-20 mA Signal Problems
Electronic pressure transmitters like the Dwyer 629-05-CH-P2-E5-S1 convert physical pressure into standardized 4-20 mA signals that interface with PLCs, HMIs, and data logging systems. Signal problems manifest as frozen readings, wildly erratic values, or complete loss of signal.
Diagnostic Procedure:
1. Measure the actual 4-20 mA signal – Using a multimeter in series with the transmitter circuit, record the milliamp output. A reading of 4.00 mA typically represents the transmitter's zero-pressure point (or its minimum calibrated range). 20.00 mA represents full-scale pressure. Any reading outside this band indicates either transmitter failure or circuit wiring problems.
2. Correlate signal to actual pressure – Simultaneously measure system pressure with an independent gauge. Calculate the expected mA output: (Actual Pressure ÷ Maximum Range) × 16 mA + 4 mA. If the calculated value differs significantly from the measured mA signal, the transmitter has drifted and requires recalibration.
3. Verify power supply quality – Transmitters require stable 24 VDC ±10%. Fluctuating power causes erratic 4-20 mA output. Connect a multimeter directly to the transmitter's power terminals and observe for voltage ripple or sag. If voltage drops below 22.8 VDC under load, upgrade the power supply.
4. Test the wiring harness – Disconnect the transmitter from its signal cable. Measure resistance between the transmitter's signal output pin and ground. The resistance should measure extremely high (>1 megohm). Lower values indicate internal moisture or corrosion inside the transmitter.
5. Check for EMI interference – Wireless communications, variable frequency drives, and large electrical switchgear generate electromagnetic interference that distorts 4-20 mA signals. If the transmitter signal is erratic but pressure is stable, shield the signal cable by running it separately from power cables and through conduit when possible.
Recalibration Strategy:
Transmitters drift predictably over time. Rather than replacing units immediately upon signal deviation, send them to a certified calibration service. 3G Electric can arrange recalibration for Dwyer transmitters within Singapore—typically a 2-week turnaround and 40% less expensive than replacement.
Maintenance and Prevention Strategies for Singapore Facilities
Environmental Protection in Tropical Conditions
Singapore's high humidity, temperature extremes, and salt-laden air (especially near maritime facilities) accelerate Measurement & Detection equipment degradation. Implement these protective measures:
For mechanical gauges: Use only glycerin-filled gauges rated IP65 minimum. Specify stainless steel housings rather than painted steel for coastal applications. Install isolation valves upstream of every gauge to enable removal and recalibration without system shutdown.
For electronic sensors and switches: Mount equipment in NEMA 4X (stainless steel) enclosures when installed outdoors or in high-humidity areas. Include desiccant cartridges inside enclosures and replace them every 6 months. Verify cable seals are present and intact—corrosion often begins at loose connector pins.
For flow probes: Install strainer elements upstream of probe insertion points. The Dwyer MAFS-20 requires clean fluid to avoid blockage. Use 10-micron beta-3 strainers on hydraulic systems to prevent varnish accumulation at probe sensing points.
Calibration and Documentation Protocols
Establish a calibration schedule based on equipment criticality and environmental exposure:
- Safety-critical pressure switches: Annual calibration verification using a portable pressure test kit. Document results in a maintenance logbook.
- Process monitoring transmitters: Bi-annual calibration against known reference sources. Trending the calibration drift over time reveals degradation patterns that enable predictive replacement planning.
- Mechanical gauges: Annual visual inspection for internal fogging or corrosion. Replace gauges showing signs of internal contamination immediately.
Singapore's tropical climate warrants more frequent calibration cycles than global standards recommend. Design your maintenance intervals around the assumption that equipment operates in high-stress environmental conditions.
Spare Equipment Stock Strategy
Pressure switches and transmitters are low-cost items with high criticality. Maintain shelf stock of commonly-used models:
- Dwyer DXW-11-153-4 pressure switches (maintain 2 units minimum)
- Dwyer 629-05-CH-P2-E5-S1 transmitters (maintain 1 unit minimum)
- Preciman glycerin-filled manometers (maintain 1 backup gauge)
- Dwyer MAFS-20 flow probes (maintain 1 spare for critical systems)
Replacement cost is negligible compared to the cost of unplanned downtime. Many Singapore plants operate 24/7 or near-continuous schedules where even 2-hour delays translate to significant production losses.
Quick Reference Troubleshooting Table
Symptom: Gauge reads zero under confirmed pressure
- Likely Cause: Bourdon tube rupture or linkage failure
- Action: Replace gauge; recalibration cannot restore function
- Likely Cause: Internal sediment blockage
- Action: Gently tap gauge; if unresolved, flush or replace
- Likely Cause: Probe insertion depth incorrect or sediment blockage
- Action: Verify probe insertion depth; visually inspect sensing ports
- Likely Cause: Setpoint drift due to temperature or mechanical wear
- Action: Perform manual calibration test with portable pressure source
- Likely Cause: Power supply failure, wiring corrosion, or EMI interference
- Action: Verify 24 VDC supply voltage; test signal wiring for shorts
- Likely Cause: Environmental temperature extremes affecting electronics
- Action: Verify operating temperature is within rated range; relocate if necessary
Conclusion
Measurement & Detection equipment failures represent a controllable source of industrial downtime when plant managers understand the diagnostic procedures and environmental factors at play. Singapore's unique climate demands more vigilant maintenance practices than global standards often recommend, but the investment in prevention—through proper equipment selection, regular calibration, and environmental protection—pays immediate returns in system reliability.
3G Electric's 35+ years of experience supporting Southeast Asian industrial operations has demonstrated conclusively that plants implementing systematic Measurement & Detection maintenance programs reduce unplanned downtime by 40-60% compared to reactive troubleshooting approaches. The procedures outlined in this guide represent best practices proven across hundreds of manufacturing, process control, and HVAC facilities throughout Singapore and the wider region.
Begin today by auditing your current Measurement & Detection equipment inventory. Identify which gauges, switches, and transmitters are beyond recommended service intervals. Contact 3G Electric to discuss recalibration services, equipment upgrades, or bulk spare parts procurement tailored to your facility's specific environmental conditions and operational requirements.