How to Install and Commission Gas Valves & Regulation Systems in Singapore Industrial Facilities
Installing and commissioning gas valve and regulation systems requires precision, adherence to safety standards, and a thorough understanding of component functions. In Singapore's competitive industrial environment, proper installation directly impacts operational efficiency, safety compliance, and equipment longevity. This guide walks you through the complete process—from pre-installation planning through final commissioning checks—ensuring your gas control system operates reliably and meets local regulatory requirements. Whether you're upgrading an existing system or deploying a new installation, following these proven methodologies will help you avoid costly mistakes and maintain compliance with Singapore's strict industrial safety standards.
Understanding Gas Valve and Regulation System Architecture
Before installation begins, you must understand how gas valves and regulators work together as an integrated system. A typical industrial gas control system consists of three functional layers: the main safety shut-off valve, the pressure regulation stage, and the modulation control interface.
The primary safety valve acts as the first line of defense, cutting gas supply immediately if pressure exceeds safe thresholds or if ignition fails. Pressure regulators downstream reduce high-pressure gas supply to usable working pressures—typically 37–300 mbar for most industrial burners. Modulating valves fine-tune gas flow during operation, responding to combustion demand and ensuring flame stability.
Understanding these functional stages is critical because installation sequence, connection orientation, and pressure calibration depend on how each component relates to the others. Pressure drops across fittings, pipe runs, and filter meshes accumulate, affecting final outlet pressure. In Singapore's humid, salt-air industrial environment, corrosion risk also influences component selection and material compatibility. Stainless steel connections and brass bodies resist degradation better than standard steel, particularly in coastal manufacturing zones.
Gas regulation systems must also comply with international safety standards like EN 161 (automatic shut-off valves for burners and appliances) and local Singapore gas regulations administered by the Energy Market Authority (EMA) and the Professional Engineers Board (PEB). Your installation approach must accommodate these compliance frameworks from the start.
Pre-Installation Planning and Component Selection
Successful installation begins with thorough pre-work. Identify your gas supply pressure (inlet pressure), required working pressure (outlet pressure), maximum flow rate, and the specific burner or appliance being served. These parameters determine which valve and regulator combination will work.
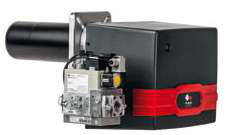
For example, if you're installing a FBR GAS XP 60/2 CE TC EVO burner (which delivers 116–630 kW thermal output), you'll need a pressure regulator that can supply stable outlet pressure even as the burner's two-stage combustion system modulates between minimum and maximum firing rates. The burner's gas consumption range (11.6–63.3 m³/h) means your regulator must handle flow turndown without pressure hunting or flame instability.
Select your primary safety shut-off valve based on connection size, pressure rating, and flow capacity. The Dungs MVD 515/5 is rated for 200 bar inlet pressure with a 1½-inch connection, making it suitable for medium-scale industrial installations. Its sub-1-second opening time and 20-cycle-per-hour switching capability suit applications requiring frequent on-off cycling.
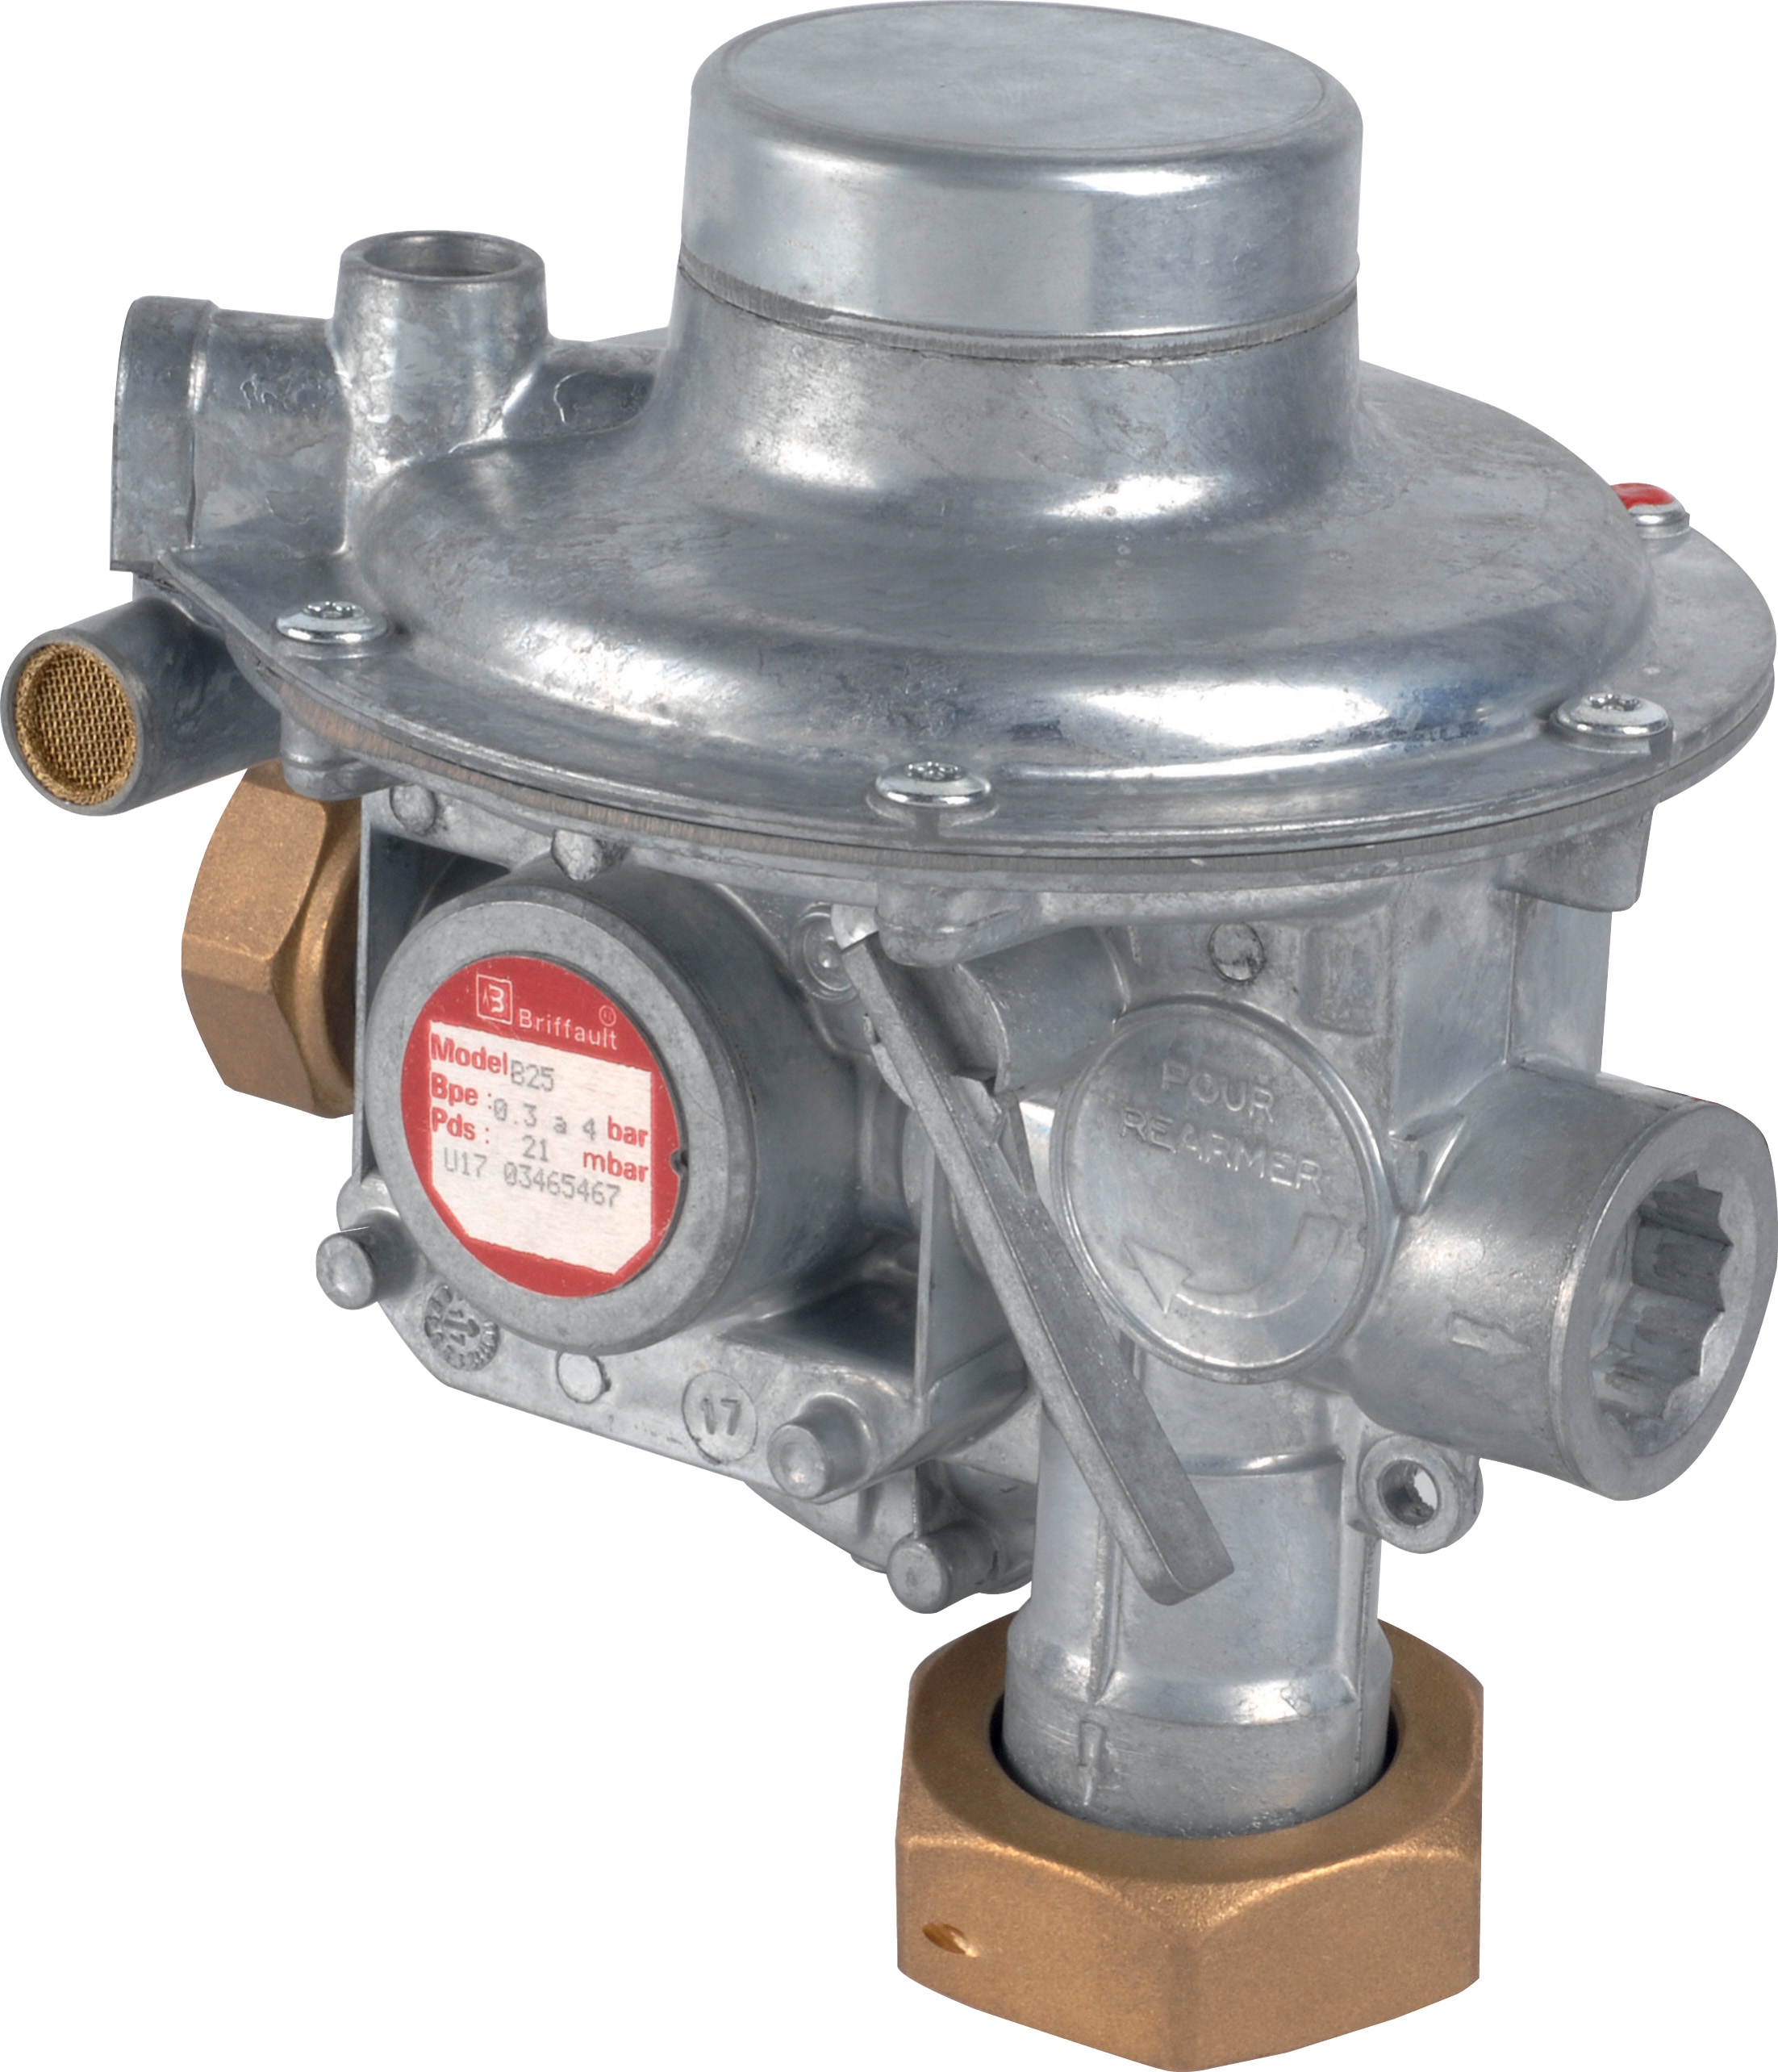
Next, choose your main pressure regulator. The Francel B25/37mb pressure regulator delivers precise 37 mbar outlet pressure with integrated safety relief, ideal for laboratory gas distribution and lower-pressure industrial applications. For higher-pressure systems requiring modulation, consider electric modulating regulators or dual-stage designs.
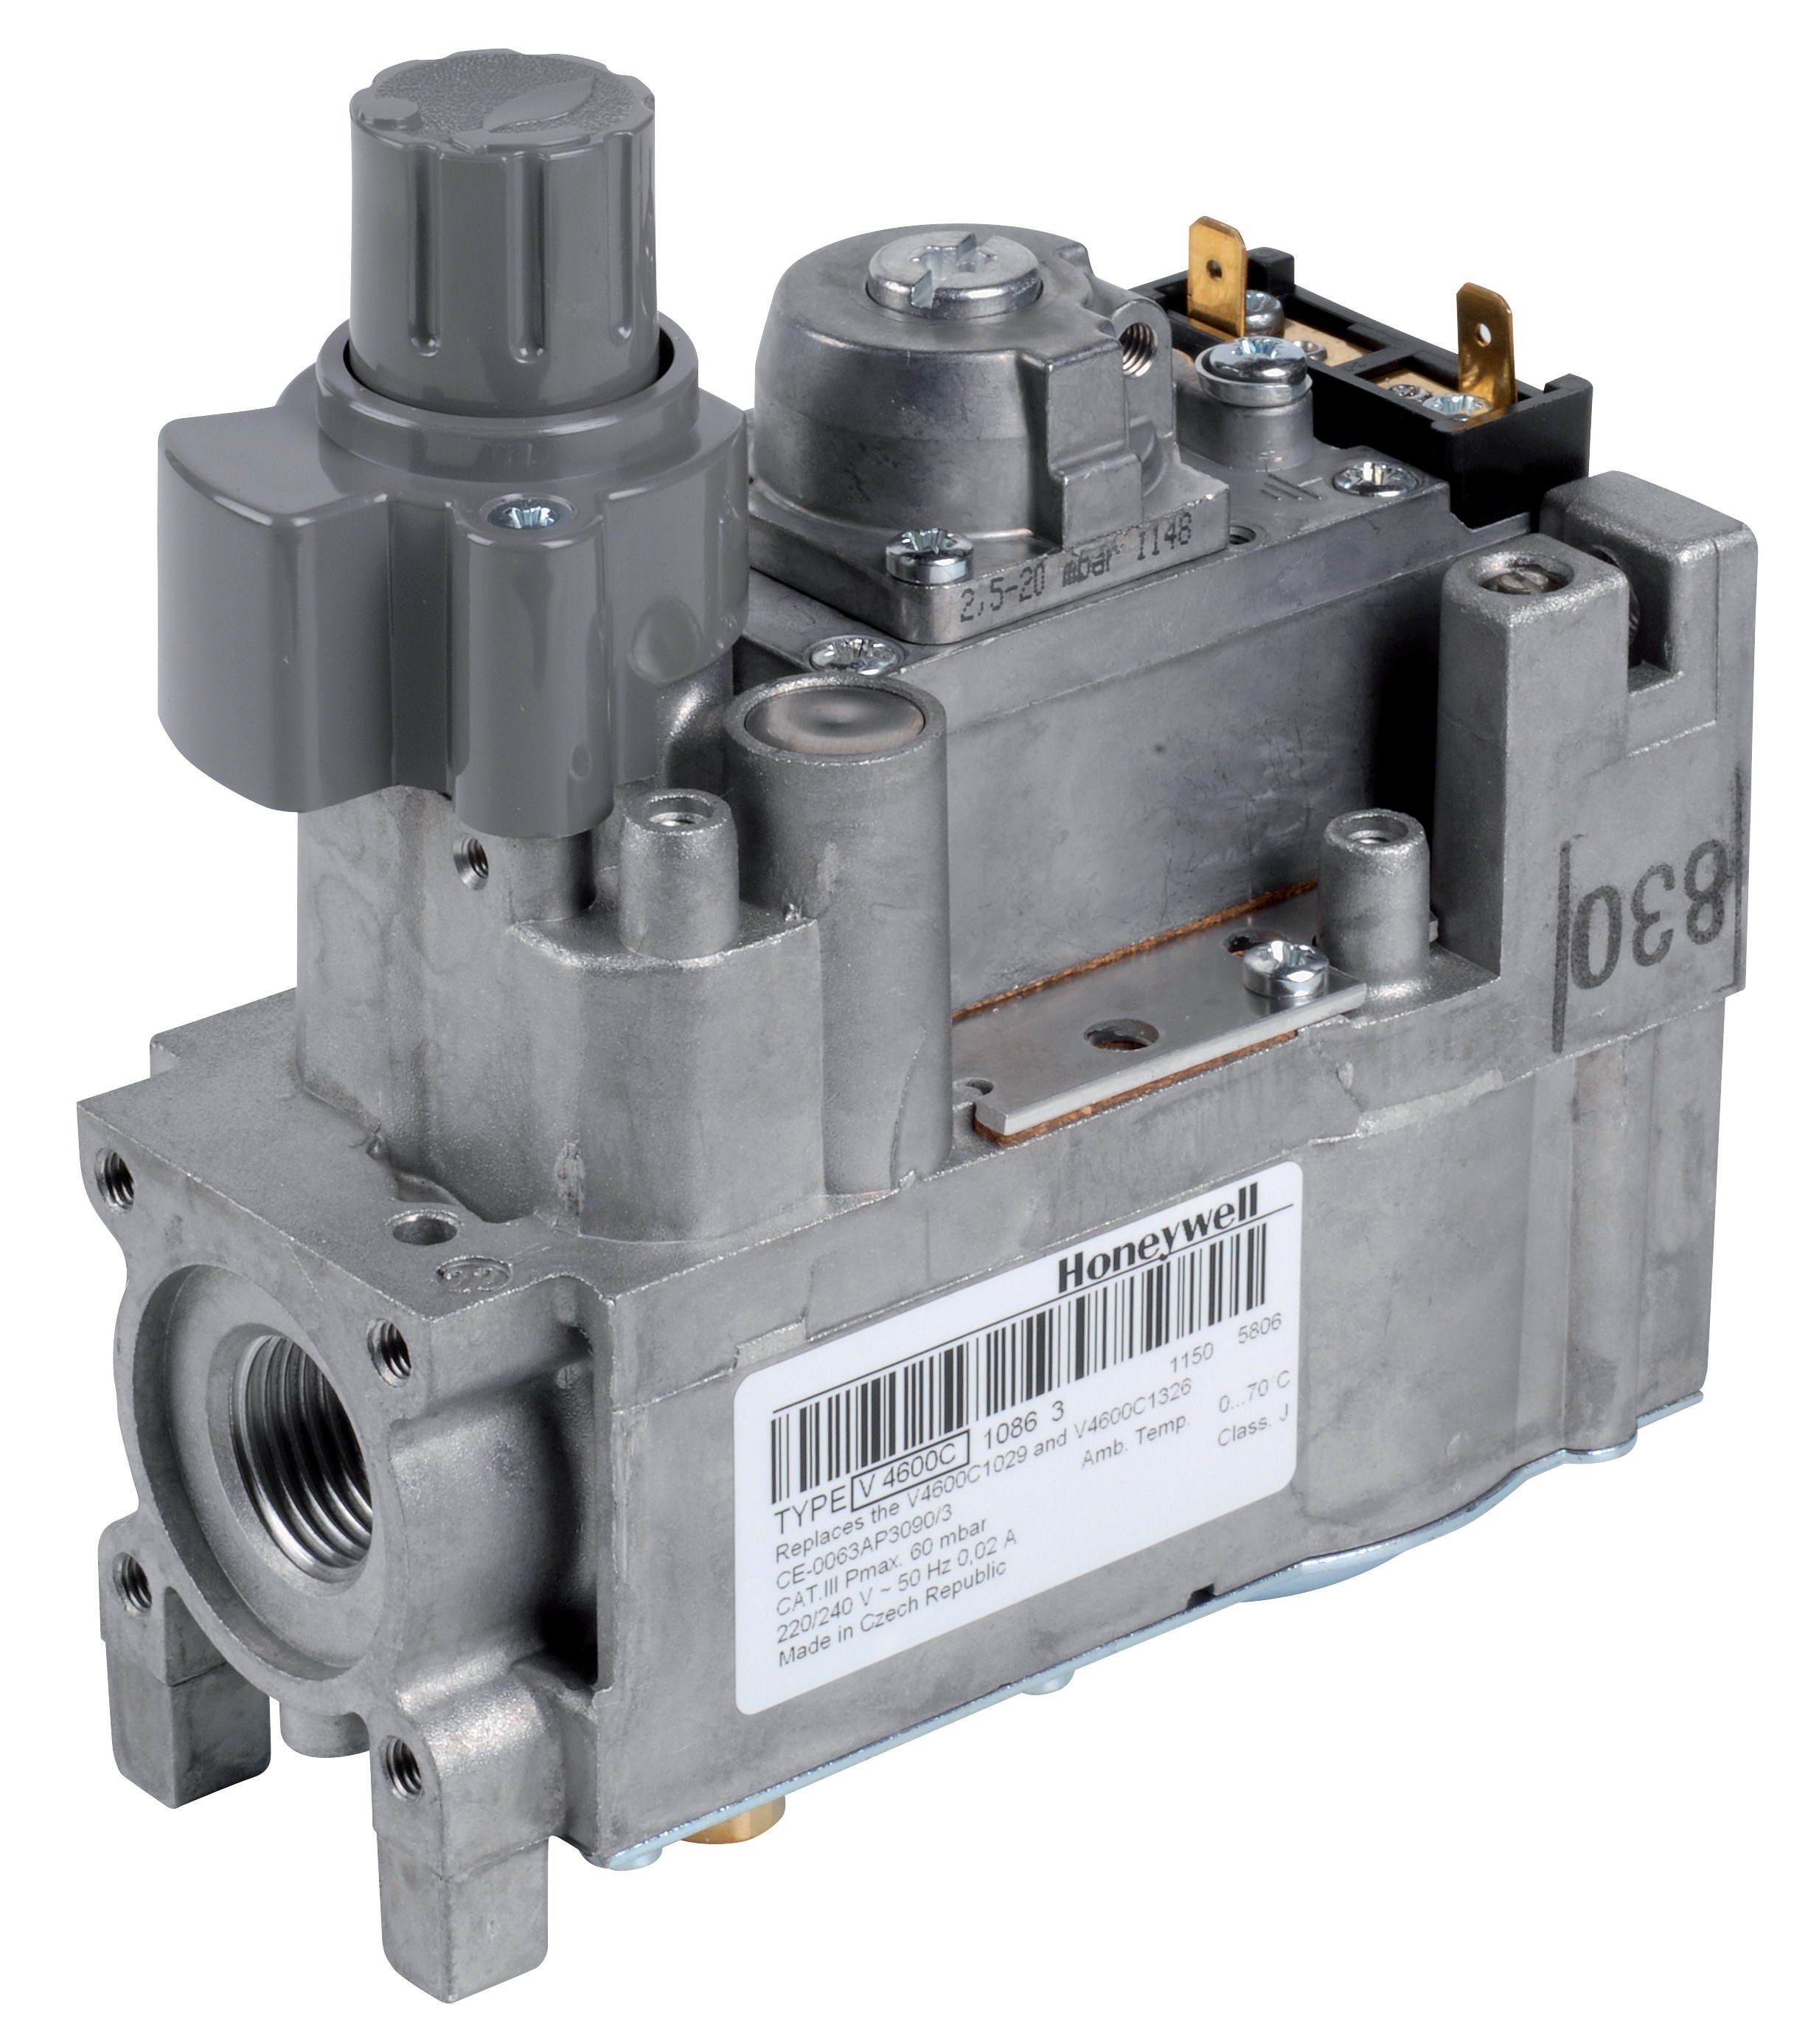
Finally, specify any end-of-stroke safety contact valves, solenoid isolation valves, or monitoring devices. The Elektrogas VMM 20-25 valve (EN 161 rated, 6 bar) provides position feedback for burner management systems, triggering ignition lockout if the gas valve fails to open or close on command.
Document all component specifications: connection sizes, pressure ratings, flow capacities, and inlet/outlet joint types. Verify compatibility—mixing metric and NPT threads, or mismatched pressure ratings, leads to installation failures and safety hazards.
Step-by-Step Installation Procedure
Step 1: Prepare the Installation Area and Gas Line
Begin by isolating the gas supply at the main shut-off valve. Bleed residual gas from the line using a test point or by loosening a fitting slightly (allow gas to vent safely away from personnel). Inspect the gas supply line for debris, moisture, or corrosion inside the pipe. Use compressed air or nitrogen (never oxygen) to blow out any contamination. In Singapore's tropical climate, moisture ingress is common—condensation inside pipes can corrode internal valve components and deposit debris that clogs small orifices.
Install a gas line strainer or filter upstream of your main safety valve to catch particles. This protects expensive regulator components and extends service intervals. Ensure all pipe runs slope slightly downward toward a low-point drain to prevent water accumulation.
Step 2: Install the Main Safety Shut-Off Valve
Mount the Dungs MVD 515/5 valve at the gas supply entry point, with the inlet connection facing the supply source. Verify inlet and outlet port orientations match your system schematic—reversing flow direction compromises valve function and can cause hazardous pressure buildup.
Apply PTFE thread sealant (not pipe dope—PTFE is safer for gas applications) to male threads only. Hand-tighten fittings first, then use appropriately sized wrenches to snug connections without over-torquing, which strips threads. A wrench-mark on the fitting is sufficient; aggressive tightening can distort valve bodies.
Leave the valve in the open position during initial installation to allow pressure testing of downstream components without valve activation.
Step 3: Install the Pressure Regulator
Connect the Francel B25/37mb regulator immediately downstream of the main safety valve. The regulator's inlet connection receives high-pressure gas; the outlet supplies controlled, regulated pressure to the burner.
Mount the regulator on a stable bracket, with the adjustment knob and relief valve vent facing downward or horizontally (never upward, which allows moisture condensation to enter the vent). The 10 mm vent must be clear and unobstructed—this is where excess pressure is vented if inlet pressure exceeds the regulator's design limit.
Connect a low-pressure test gauge (0–100 mbar range) to the regulator outlet before connecting the burner. This allows you to verify outlet pressure calibration without risking burner damage.
Step 4: Connect Safety and Monitoring Devices
Install the Elektrogas VMM 20-25 end-of-stroke valve on the burner side of the main safety valve, downstream of the pressure regulator. This valve provides electrical feedback confirming gas valve position—critical for burner control systems. Connect its electrical terminals to the burner's flame safeguard control according to the wiring schematic, observing correct polarity.
If your system includes solenoid isolation valves or coils, ensure they are rated for the outlet pressure of your regulator (typically 37–100 mbar for most burners). Connect pilot lines (small-diameter tubing supplying pilot pressure) to appropriate tapping points, ensuring they are clean and free of kinks.
Step 5: Perform Pressure Test and Leak Check
Close all manual isolation valves and the main shut-off valve. Connect a handheld manometer (digital or analog pressure gauge, 0–250 mbar range) to an accessible test point on the gas line between the regulator outlet and the burner. Slowly open the main shut-off valve and allow pressure to stabilize (typically 30–60 seconds).
Note the pressure reading. For a Francel B25/37mb regulator, outlet pressure should be approximately 37 mbar. If pressure exceeds this by more than ±2 mbar, the regulator requires adjustment (see commissioning section below).
Apply a soapy water solution to all visible connections and fittings. Bubbles indicate gas leakage. Mark any leaking connections with tape and tighten incrementally using two wrenches (one holding the valve body, one turning the fitting). Do not over-tighten. If bubbles persist after snugging, close the main valve, remove the fitting, inspect the connection joint for debris or damage, re-apply thread sealant, and reconnect.
Perform this leak check in dry conditions (never during rain in Singapore, as moisture affects soapy water effectiveness) and allow at least 10 minutes observation before declaring the system leak-free.
Step 6: Connect the Burner and Perform Flow Test
Once pressure and leaks are verified, connect the regulator outlet to the burner inlet using appropriately sized gas line. For medium-capacity burners like the FBR GAS XP 60/2 CE TC EVO, a ¾-inch or 1-inch connection is typical, depending on nozzle size and gas type (natural gas vs. LPG).
Before ignition, leave manual isolation valves open and allow gas to flow (unburned) for 30 seconds to purge air from the gas line and burner combustion head. This prevents delayed ignition or explosive ignition when the spark plug fires.
Commissioning and Final Verification
Regulator Pressure Calibration
With the burner running at low fire (minimum modulation), observe the outlet pressure gauge. If pressure is too high, use a flat-head screwdriver or Allen wrench (depending on regulator design) to turn the adjustment screw counterclockwise in small increments (¼-turn at a time), waiting 20 seconds between adjustments for pressure to stabilize. If pressure is too low, turn clockwise. Target outlet pressure should match the burner manufacturer's specification—typically 37–100 mbar for most industrial gas burners.
Once calibrated at low fire, increase the burner to high fire and verify pressure remains stable within ±3 mbar. Pressure hunting (oscillating up and down) indicates improper calibration or a faulty regulator—shut down immediately and investigate.
Safety Valve Testing
The Francel B25/37mb regulator includes integrated safety relief. With the burner off and the main safety valve open, gradually close the manual isolation valve downstream of the regulator. As pressure in the isolated section rises, the safety relief should vent excess gas (you'll hear a faint hissing) once pressure exceeds the regulator's design limit (typically 10–15% above nominal outlet pressure). This confirms the safety mechanism is functioning. Do not perform this test with the regulator outlet isolated from atmosphere, as excessive pressure buildup can damage components—always ensure the relief vent is open and clear.
Flame Stability and Combustion Verification
Start the burner following the manufacturer's ignition sequence. Observe the flame color and stability. A stable, blue flame (for natural gas) indicates proper combustion. Yellow or flickering flames suggest inadequate gas pressure, air/gas ratio imbalance, or burner fouling. Adjust the regulator outlet pressure in 2–3 mbar increments until flame stability is optimal.
For two-stage burners like the FBR GAS XP 60/2 CE TC EVO, verify that the modulation transition from low fire to high fire is smooth and flame does not extinguish during the transition. If flame extinguishes, pressure may be dropping excessively as flow increases—increase regulator outlet pressure slightly.
Documentation and Sign-Off
Record all test results: initial inlet pressure, outlet pressure at low fire and high fire, maximum and minimum outlet pressures observed, any adjustments made, and the date and time of commissioning. Take photographs of the installed system, valve positions, and gauge readings. Retain these records for compliance audits and future service reference. Singapore's PEB and EMA regulations require documented commissioning evidence for commercial and industrial gas installations.
Installation Best Practices and Common Pitfalls
Avoid Pressure Gauge Contamination
Never connect pressure gauges directly to high-pressure gas lines without a pressure-limiting snubber. Sudden inlet pressure spikes can burst gauge diaphragms, releasing gas and causing safety hazards. Always use a snubber or isolation ball valve between the test point and the gauge.
Use Correct Pipe Materials and Sizes
In Singapore's coastal industrial zones, steel gas pipes corrode rapidly. Specify stainless steel or copper tubing for exposed runs. Minimize pipe diameter changes and elbows, which create turbulence and pressure loss. Use smooth-bore tubing; corrugated or kinked lines introduce flow restriction and pressure hunting.
Maintain Proper Valve Orientation
Safety shut-off valves like the Dungs MVD 515/5 are directional—gas must flow from inlet to outlet. Reversing flow direction prevents proper valve closure and can cause dangerous pressure buildup downstream. Always verify inlet and outlet port markings before installation.
Test in Stable Environmental Conditions
Perform commissioning during daytime hours with stable ambient temperature. Morning and evening temperature swings in Singapore can cause regulator outlet pressure to drift by several mbar, leading to false calibration errors. Allow 30 minutes for the system to thermally stabilize before fine-tuning pressure settings.
Schedule Regular Verification Post-Commissioning
After commissioning, schedule a follow-up system check 72 hours later. Minor pressure drift or slow leaks often appear after initial pressurization. A second verification prevents operational surprises and confirms the system is truly stable.
Safety and Regulatory Compliance
Singapore's gas safety framework requires that all industrial gas installations comply with the Gas Safety Regulations and relevant pressure equipment directives. Installers should hold appropriate qualifications and maintain liability insurance. Before beginning any installation, notify your local Gas Piping Safety Board or equivalent authority and obtain required permits.
During installation, keep the work area ventilated. Never work alone—always have a second person present who understands emergency procedures. Maintain a clear emergency shutdown protocol and ensure all personnel know the location of manual isolation valves and emergency vents.
Post-installation, create a system label showing inlet pressure rating, outlet pressure setting, maximum flow rate, and the date of commissioning. Mount this label visibly on the main safety valve or regulator housing so maintenance personnel can reference critical parameters.
Conclusion: Professional Installation Ensures Reliability and Safety
Installing and commissioning gas valve and regulation systems is a skilled trade requiring attention to detail, understanding of pressure dynamics, and adherence to safety protocols. By following this step-by-step approach—planning component selection carefully, executing installation methodically, and commissioning thoroughly—you'll deploy a gas control system that operates reliably, meets Singapore's stringent safety requirements, and delivers years of trouble-free service.
The products available through 3G Electric—including the Francel B25/37mb regulator, Dungs MVD 515/5 valve, and Elektrogas VMM 20-25 safety contact valve—represent industry-leading reliability and precision. However, the system is only as good as its installation. If you're uncertain about any step in this process, contact 3G Electric's technical team for expert guidance. Our engineers in Singapore have decades of combined experience commissioning gas control systems across refineries, manufacturing plants, and utility installations. We provide post-sale support, commissioning assistance, and spare parts to ensure your gas regulation system performs optimally throughout its operational life. Reach out to 3G Electric today to discuss your installation requirements and schedule a consultation with our technical specialists.