Understanding Burners & Combustion System Architecture
Burners & Combustion systems in industrial applications operate as integrated assemblies where multiple components must function in precise synchronization. The combustion process itself—the controlled oxidation of fuel with air—depends on proper flame detection, gas delivery regulation, and control signal verification. For maintenance teams, understanding this architecture is fundamental to effective diagnostics.
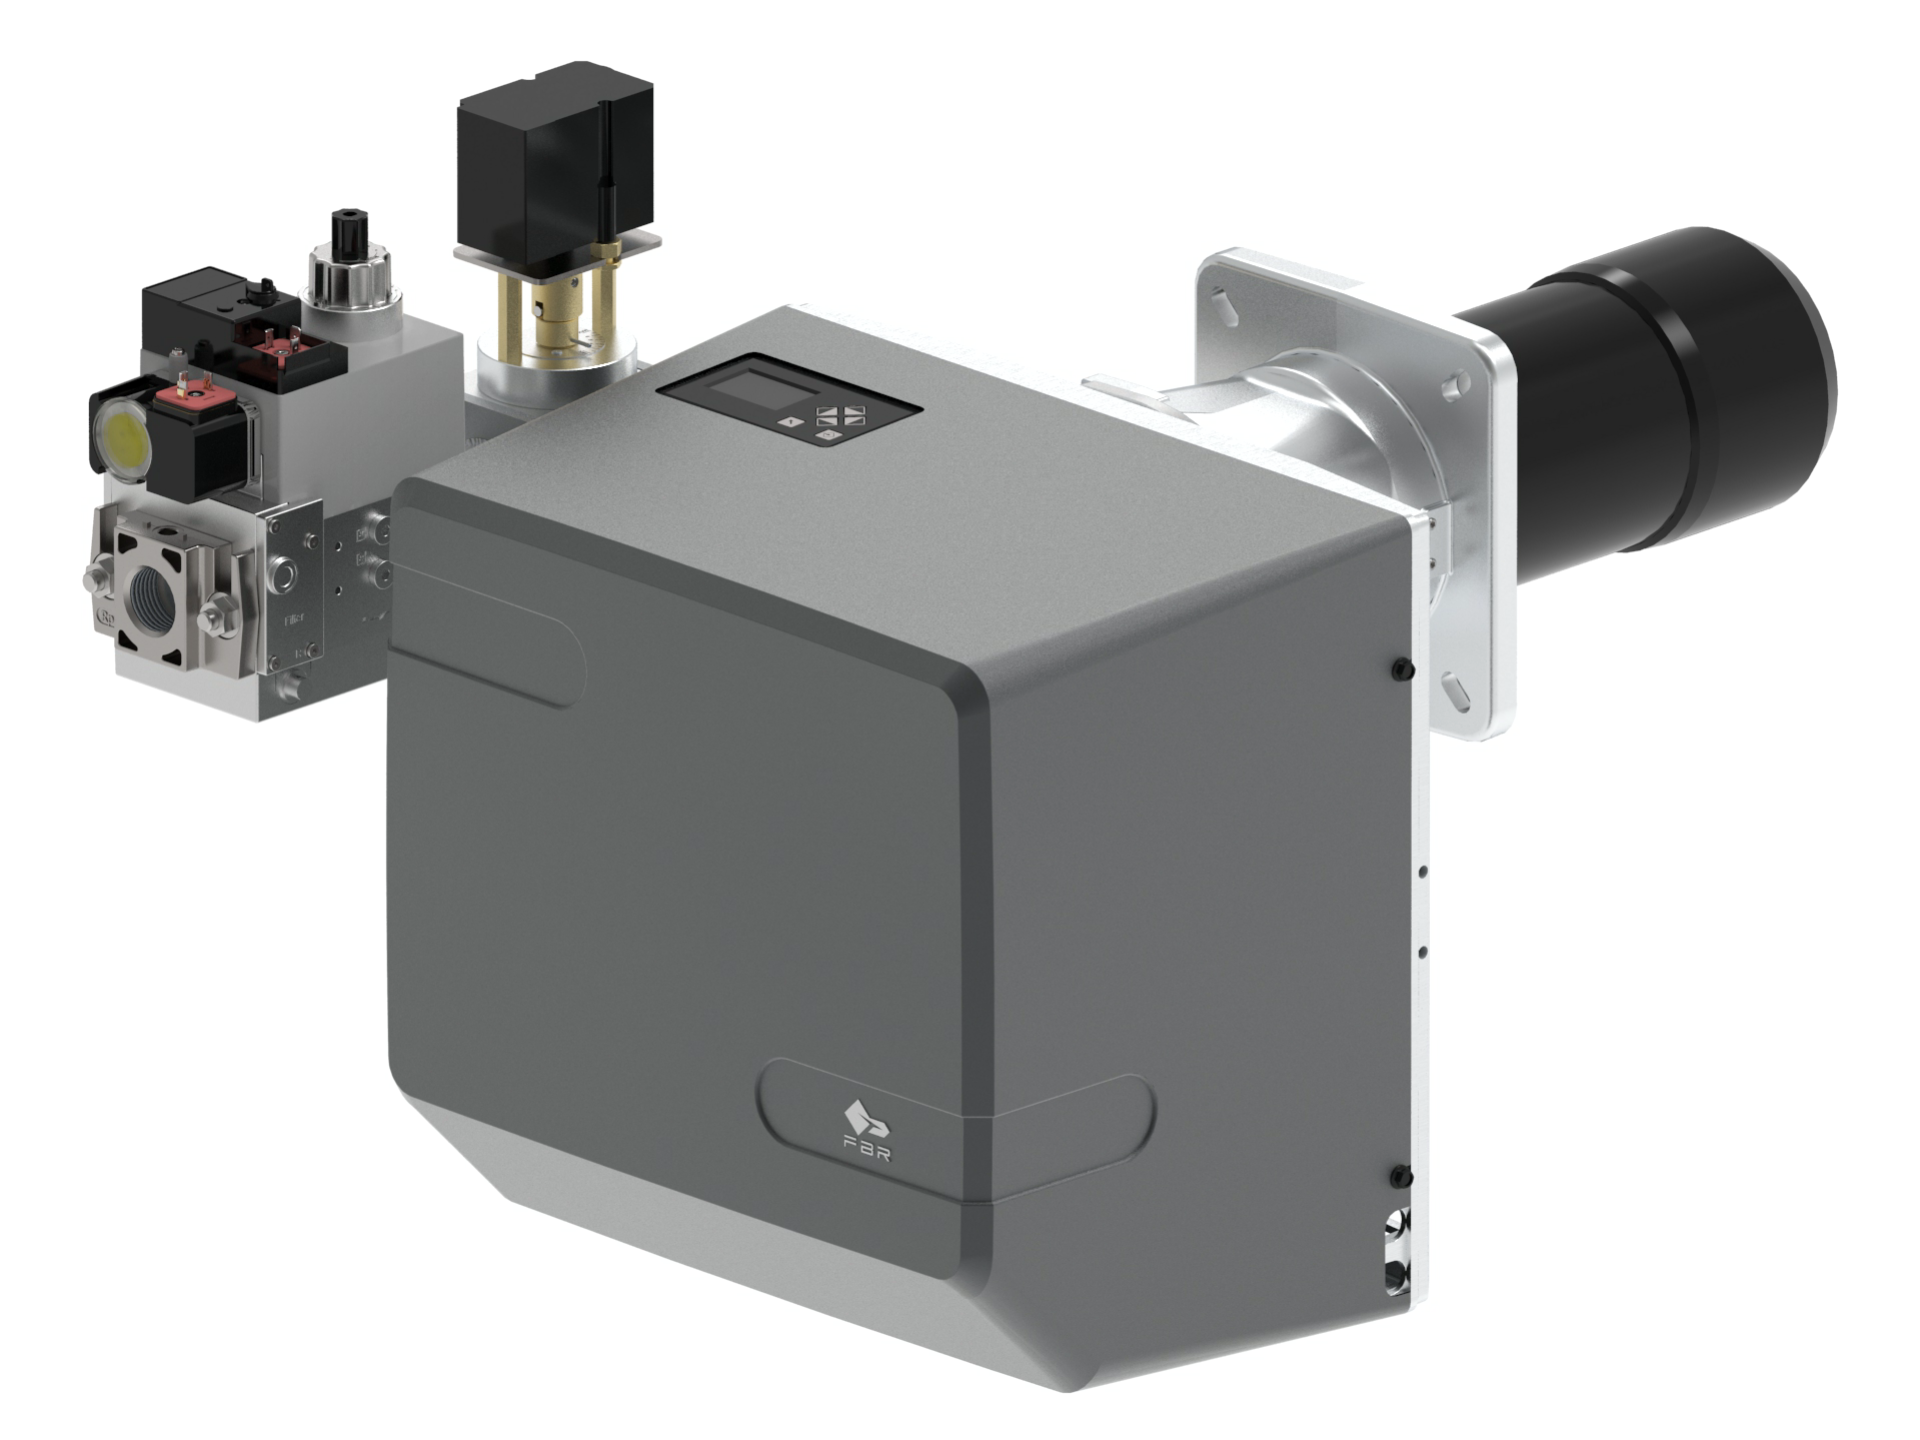
A modern gas burner system comprises several critical elements: the burner body (typically die-cast aluminum for durability), the fuel delivery mechanism with solenoid control, the ignition system, the flame detection probe, and the control relay network. When any single component fails or drifts from specification, the entire system's combustion efficiency and safety performance deteriorate. The FBR BURNER GAS X5/MF TL EL VC LPG represents current-generation modulating burner technology, incorporating PID (Proportional-Integral-Derivative) control when equipped with optional modulation kits and high-pressure fan assemblies.
The combustion process itself follows a predictable sequence: solenoid valves open fuel flow, ignition electrodes create a pilot flame, the main burner flame ignites, and flame detection sensors confirm stable combustion. Control relays monitor this sequence continuously. Any deviation—delayed flame establishment, unstable flame signal, or abnormal pressure readings—triggers diagnostic protocols that maintenance teams must understand to prevent costly downtime.
Systematic Troubleshooting: From Symptom to Root Cause
Maintenance teams addressing burner problems must follow a disciplined diagnostic approach. Rather than replacing components randomly, effective troubleshooting uses observable symptoms to guide investigation toward the actual failure point.
Symptom Category 1: Burner Won't Ignite or Establishes Flame Unreliably
When a burner fails to ignite on demand, the root cause typically lies in one of three areas: fuel supply, ignition capability, or control signal validity. Begin by confirming gas pressure at the burner inlet matches design specifications—typically 20-50 mbar for atmospheric burners, higher for forced-draft systems. Use a manometer for accurate pressure measurement; gauge readings can be misleading due to pulsation.
Next, verify solenoid valve operation. The CBM VCS 1E25R/25R05NNWL3/PPPP/PPPP double solenoid valve controls fuel access and must open fully when energized. Listen for the distinctive solenoid "click" when control voltage is applied. If absent, check control wiring continuity and voltage presence at the solenoid coil terminals using a multimeter. Double solenoid designs provide redundancy—if one solenoid fails, fuel still cannot reach the burner, a safety feature requiring replacement before restart.
Ignition electrode condition demands inspection. Electrode spacing typically ranges from 3-4mm; excessive gap prevents spark bridging, while too-close spacing causes short circuits. Inspect ceramic insulators for cracks or contamination. Electrode tips should be smooth; oxidized or eroded tips require replacement. Test ignition output using an ignition probe (a specialized meter that measures high-voltage pulse characteristics) rather than visual observation of sparks.
Symptom Category 2: Flame Ignites but Won't Stabilize or Trips on Flame Failure
Flame instability indicates either marginal combustion conditions or flame detection sensor problems. The flame detection circuit is critical—most systems use UV or infrared sensors that convert flame presence into an electrical signal the control relay interprets as "combustion confirmed."
Inspect the flame detection probe first. Any fouling, carbon deposits, or discoloration on the sensor window blocks flame detection signals. Clean carefully with soft materials; harsh scouring damages the sensor. For UV detectors, look for physical damage to the sensor tube itself. Note that UV sensors age gradually; response sensitivity decreases over 10,000-20,000 operating hours, eventually becoming unable to detect marginally stable flames.
The CBM Flame relay CF1 processes the flame signal and determines if combustion is established. Testing requires introducing a flame near the sensor (during safe testing conditions) while monitoring relay contact closure using a multimeter on continuity mode. No contact closure when flame is present indicates either sensor failure or relay failure. If the relay responds to flame but the burner still shuts down, check the relay supply voltage and contact load ratings—an undersized relay may fail to energize safety solenoids properly.
Symptom Category 3: Erratic Modulation or Poor Combustion Efficiency
When burners equipped with modulation kits exhibit hunting (frequency oscillation between high and low fire) or respond sluggishly to load changes, the PID control loop is not optimized. The modulation probe measures actual flame intensity or fuel pressure, feeding this signal back to the control module for adjustment.
Verify probe continuity and sensor signal output using an oscilloscope or a meter capable of measuring millivolt signals. Incorrect probe positioning—if the probe has shifted or become partially blocked—changes the feedback signal falsely, causing the control loop to make inappropriate adjustments. Secure the probe mechanically and verify it has clear line-of-sight to the flame.
Check control relay CM391.2 30.5 1.2 module parameters and adjust PID constants (Proportional, Integral, and Derivative gains) following the equipment manufacturer's specifications. Most burners ship with conservative settings; aggressive PID tuning improves response but can cause instability. Small adjustments (typically 10% increments) prevent overshooting.
Component Testing and Acceptance Criteria
Maintenance teams must establish baseline performance standards for critical components. Simply energizing a solenoid valve and hearing a click does not confirm proper operation; full testing requires measuring actual function.
Solenoid Valve Testing: Beyond listening for the solenoid click, measure the voltage drop across the coil while energized (typically 1-3V for AC coils, indicating proper current draw). Measure gas flow rate or pressure rise after the solenoid opens—a clogged or partially stuck valve allows only reduced flow, degrading burner performance. The double solenoid configuration of the CBM VCS 1E25R/25R05NNWL3/PPPP/PPPP requires both solenoids to open for fuel delivery; if either fails, the burner remains locked out.
Flame Relay Testing: Using a calibrated UV light source or IR lamp positioned where the burner flame normally appears, confirm the relay contacts close within 100-200ms. The relay should hold the "flame detected" state as long as the light source remains present and release (contact open) within 500ms of light removal. Slower response times or chattering contact indicate aging sensors or relay contact degradation.
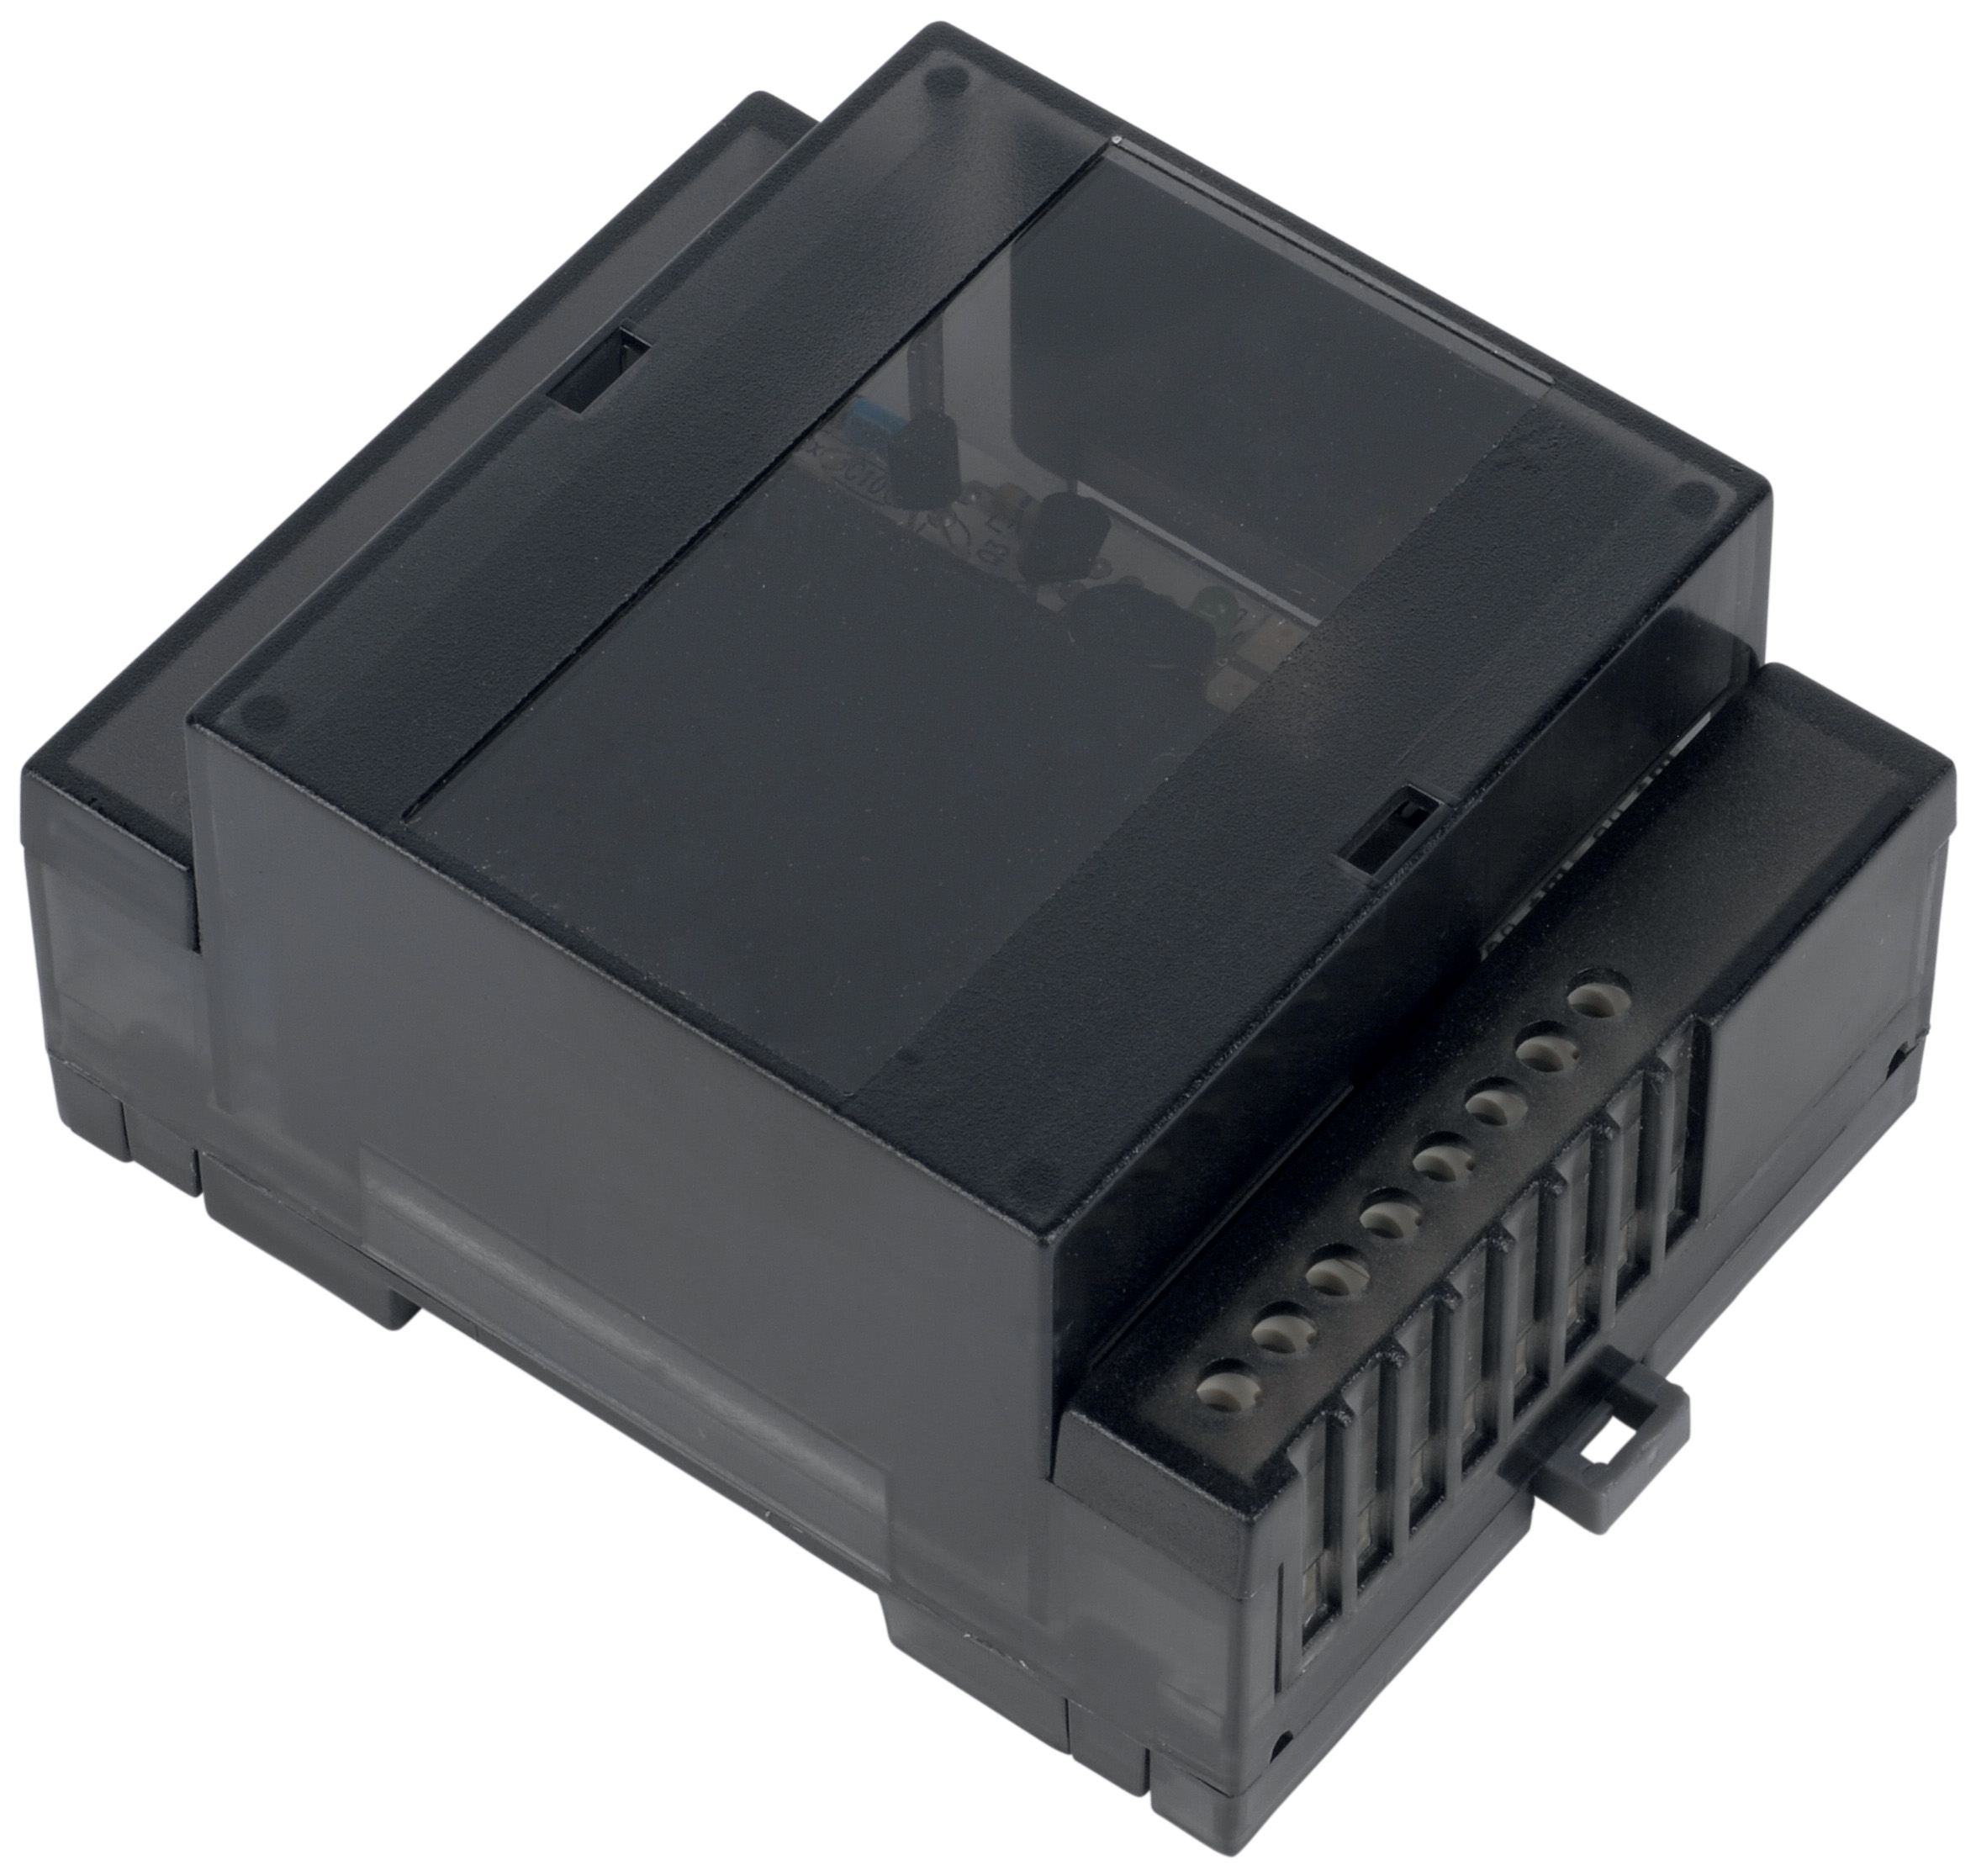
Control Relay Base Testing: The CBM Base LGK AGM17 provides mechanical mounting and electrical interface for control relays. Test continuity of all internal connections using a multimeter on resistance mode. Corroded contacts can prevent reliable signal transmission even though the relay itself functions. Oxidized contact surfaces appear dull gray or green; cleaning with isopropyl alcohol often restores function, but heavily pitted contacts require base replacement.
Burner Body Inspection: Examine the die-cast aluminum body (as in the FBR BURNER GAS X5/MF TL EL VC LPG) for cracks, particularly around electrode mounting areas where thermal stress concentrates. Hairline cracks in cast aluminum permit gas leakage, creating safety hazards and reducing burner performance. Small cracks can be sealed with high-temperature epoxy temporarily, but structural cracks require component replacement.
Preventive Maintenance and Performance Optimization
Effective burner maintenance minimizes reactive troubleshooting through planned interventions. Establish maintenance intervals based on operating hours and fuel type.
High-Frequency Tasks (Monthly or 500 Operating Hours):
- Visual inspection of flame color and stability. Healthy flames are blue with minimal yellow tip; yellow flames indicate incomplete combustion or excess air.
- Confirmation of proper air/fuel ratios using an oxygen analyzer if available. Target oxygen in flue gas is typically 2-4% for natural gas burners.
- Pressure gauge verification. Record baseline pressures when the system operates properly; deviations indicate drift or component degradation.
- Flame detection probe window cleaning to prevent fouling.
- Solenoid valve function confirmation through listening and voltage measurement.
- Burner body visual inspection for cracks or corrosion.
- Complete ignition electrode inspection and replacement if spacing or condition has degraded.
- Flame detection sensor replacement if response times have slowed or signal strength has diminished.
- Solenoid valve removal, inspection, and cleaning of internal orifices.
- PID tuning optimization if equipped with modulation capability.
- Control relay contact inspection and replacement if burning or pitting is visible.
Maintenance records documenting these activities create a historical baseline that helps predict component life and plan budgetary provisions. Over 35 years of equipment distribution experience, 3G Electric has observed that planned maintenance costs typically equal 5-10% of burner system value annually, while reactive emergency repairs often exceed 30-50% of value, plus production loss penalties.
Proper maintenance of Burners & Combustion systems requires systematic thinking, accurate test equipment, and disciplined documentation. By following these diagnostic approaches and preventive protocols, maintenance teams can achieve reliability targets exceeding 99% while optimizing fuel efficiency and extending equipment service life.