Understanding Burners & Combustion Control Failures in Singapore Industrial Operations
Burners & Combustion control failures represent one of the most costly unplanned maintenance events in Singapore's industrial sector. Unlike simple mechanical breakdowns, combustion system failures often involve interconnected safety controls, making diagnosis complex for maintenance teams unfamiliar with control system logic. When a burner fails to ignite, shuts down unexpectedly, or enters lockout mode, the problem could originate from the ignition relay, pressure monitoring, flame detection, or fuel valve control—requiring systematic troubleshooting rather than component replacement guessing.
With over 35 years of industrial equipment distribution experience, 3G Electric has supported maintenance teams across Singapore's petrochemical, manufacturing, and HVAC sectors through thousands of control system failures. This article provides actionable diagnostic procedures that maintenance teams can implement immediately to reduce burner downtime and improve system reliability.
Diagnostic Framework: The Control System Testing Sequence
Step 1: Visual Inspection and Operational Observation
Before any electrical testing, maintenance teams should perform structured observation:
- Burner startup behavior: Does the burner attempt to ignite? Does it produce flame momentarily before lockout? Does the fuel valve open? These observations indicate where the control sequence breaks.
- Lockout codes: Document the exact lockout message or indicator lamp sequence. Most burner control units produce diagnostic codes that point directly to the failure point.
- Pilot light status: If equipped with intermittent or continuous pilot ignition, observe whether the pilot ignites successfully. Pilot failure often triggers main burner lockout.
- Noise patterns: Listen for solenoid clicking (indicating electrical signal to fuel valve), flame detection relay chattering, or control transformer humming. Silence at expected points suggests signal path interruption.
Step 2: Electrical Continuity and Voltage Testing
For the Kromschroder Relay BCU 570WC1F1U0K1-E, a SIL-compliant safety relay supporting both direct ignition and pilot modes, maintenance teams should follow this sequence:
Control power supply verification:
- Measure AC voltage at the control transformer secondary terminals. Most burner controls operate on 24V AC, though some use 120V AC. Check against the relay's rated voltage specification.
- Verify voltage is stable (±10% variation is acceptable). Flickering voltage indicates transformer or input power issues.
- If voltage is below specification, the relay cannot sustain ignition coil energization, causing spurious lockout.
- With power on, measure voltage at the ignition electrode terminals using a high-impedance meter. The BCU 570WC1F1U0K1-E should supply approximately 4–6 kV AC for electrode spark generation.
- If voltage is absent, the relay's ignition output stage has failed; the component requires replacement.
- If voltage is present but flame ignition fails, suspect a spark plug fouling or electrode gap degradation—visual inspection under power removal is required.
- For systems with the Siemens LFL 1.622 safety relay installed, test the flame detection sensor circuit by measuring DC voltage at the flame signal input. The sensor should produce 1–5V DC when flame is present.
- If the sensor voltage remains below 0.5V even with visible flame, the UV or ionization sensor element is degraded and requires replacement.
- Disconnect the sensor connector and measure resistance with a multimeter. Open-circuit resistance (>10 MΩ) or shorted resistance (<100 Ω) confirms sensor failure.
Step 3: Pressure Switch Validation for Fuel Supply
The Kromschroder DG 50U/6 pressure switch, rated SIL 3, monitors fuel supply pressure and prevents ignition attempts during low-pressure conditions. Maintenance teams should validate this critical safety component:
Static pressure measurement:
- With the burner in standby, measure fuel supply pressure at the burner inlet using a calibrated pressure gauge. Most gas burners require 17–25 mbar; oil burners typically require 8–12 bar.
- If measured pressure is below the pressure switch setpoint, the fuel pump, supply regulator, or piping restriction is the root cause—not the switch itself.
- Set a multimeter to resistance (ohm) measurement mode and connect across the pressure switch terminals.
- With the burner in standby and pressure below setpoint, the switch should read "open" (infinite resistance or "OL" on the multimeter display).
- Manually apply pressure (using a foot pump on oil lines or regulated gas pressure) and observe the switch closing (resistance drops to <1 Ω).
- If the switch fails to close even at adequate pressure, the internal electrical contact is corroded or the bellows element has failed; replace the DG 50U/6 unit.
Practical Diagnostic Decision Tree for Maintenance Teams
Scenario A: Burner Fires Initially, Then Lockout Within 10 Seconds
This pattern typically indicates flame detection failure or incorrect flame signal tuning:
1. Inspect the flame detection sensor (UV or ionization type) for fouling. Soot accumulation on sensor elements blocks UV light or reduces ionization efficiency. Clean the sensor window with a soft cloth; do not use abrasive materials.
2. Verify sensor orientation if recently serviced. UV sensors require direct line-of-sight to the flame; even 5–10° misalignment can cause non-detection.
3. Test the sensor electrical output as described above. A failing sensor outputs insufficient voltage or becomes unresponsive to flame presence.
4. Check the relay's flame recognition sensitivity. The Siemens LFL 1.622 includes tuning for UV vs. ionization detection; incorrect selection causes false lockouts.
Resolution: Clean sensor → retest → replace sensor if fault persists → contact control unit manufacturer for sensitivity calibration.
Scenario B: Fuel Valve Solenoid Does Not Energize; No Ignition Attempt
The fuel valve solenoid receives signal from the control relay but fails to open:
1. Measure voltage at the solenoid coil terminals with the burner in "run" mode. The relay should supply full control voltage (24V AC or 120V AC depending on system design).
2. If voltage is present but the solenoid does not click, the solenoid coil is internally open and requires replacement. Do not attempt to repair; solenoid coil resistance exceeds 500 Ω when open.
3. If voltage is absent, the signal path from the relay to the solenoid is interrupted. Check for loose terminals, corroded connectors, or tripped emergency shutoff switches in the fuel supply line.
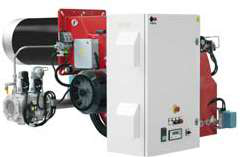
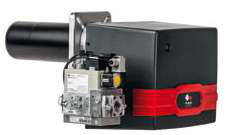
4. For the FBR GAS XP 60/2 CE TC EVO and FBR KN 1300/M TL EL burners, verify that both the main and pilot fuel solenoids are energized. Some systems require both to open before flame is possible.
Resolution: Test solenoid coil resistance → replace if open → verify relay output → check signal wiring continuity.
Scenario C: Intermittent Lockouts During Normal Operation
Spurious lockouts during steady-state burning indicate marginal component performance or environmental stress:
1. Monitor flame signal voltage stability over 5–10 minutes. Voltage fluctuations >20% indicate either a weakening sensor or vibration-induced connector loosening.
2. Check the control relay for corrosion inside the terminal block. Humidity in Singapore's tropical climate accelerates corrosion; white or green oxidation on relay terminals reduces contact reliability.
3. Verify burner air/fuel ratio calibration. Improper mixture reduces flame intensity, causing the flame detector to drop below the relay's recognition threshold.
4. Test the pressure switch at the operating pressure point. If fuel pressure drifts near the switch setpoint (e.g., 17 mbar on an 18 mbar setpoint switch), vibration can cause the electrical contact to chatter in and out.
Resolution: Clean all relay and switch terminals → re-seat all connectors → recalibrate air/fuel ratio → consider upgrading pressure switch hysteresis if drift is unavoidable.
Component Replacement and System Commissioning
Once diagnostics identify a failed component, maintenance teams must ensure proper replacement:
For relay replacement (e.g., BCU 570WC1F1U0K1-E or LFL 1.622):
- Verify the replacement unit has identical certification (EN 746-2, SIL rating, UL/FM listing if required by local regulations).
- Photograph the existing terminal connections before disconnection to ensure proper re-wiring.
- After installation, perform a full system startup test with all safety lockout sequences validated.
- Ensure the replacement unit is rated for the same fuel type (gas or oil) and pressure range.
- Verify the setpoint matches the original (typically marked on the switch body).
- After replacement, measure fuel supply pressure and confirm the switch responds predictably at 0.5–1.0 mbar above setpoint.
- Before disconnecting fuel and electrical lines, document the current system configuration (firing rate, air/fuel ratio if adjustable, safety interlock settings).
- After installation, allow 24 hours for any moisture in fuel systems to settle before initial startup.
- Perform a full commissioning cycle, including burner ramp-up and flame stability observation over 15 minutes of continuous operation.
Maintenance Planning: Preventing Control System Failures
Proactive maintenance reduces diagnostic emergencies:
- Annual relay inspection: Clean terminals, check for corrosion, verify secure connections.
- Pressure switch testing: Measure actual fuel pressure quarterly; compare against setpoint documentation.
- Flame sensor cleaning: Clean UV/ionization sensor elements every 6 months in dusty or sooty environments; monthly in high-fouling applications.
- Control transformer monitoring: Verify output voltage remains stable during burner operation; transformers with >20-year service history are candidates for preventive replacement.
- Documentation protocol: Maintain a log of all burner startups, lockout events, and diagnostic findings. Patterns of intermittent lockouts often precede catastrophic failure by weeks or months.
With systematic diagnostic procedures and proper component replacement, maintenance teams can reduce burner control system downtime from hours to minutes. 3G Electric's 35+ years of industrial equipment distribution across Singapore's industrial base means our technical specialists can support your team with component selection, commissioning guidance, and advanced troubleshooting—ensuring your Burners & Combustion systems operate safely and reliably.