Understanding Pumps & Compressors in HVAC Applications
Pumps and compressors serve different but equally critical roles in modern HVAC systems. Pumps circulate chilled water or refrigerant through cooling coils and distribution networks, while compressors pressurize refrigerant to facilitate heat transfer. In Singapore's high-temperature, high-humidity climate, proper installation becomes even more critical—poorly installed systems face accelerated corrosion, reduced efficiency, and premature failure.
With over 35 years of experience distributing industrial equipment across Asia, 3G Electric has supported countless HVAC contractors through installations in challenging environments. The difference between a system that performs flawlessly for a decade and one that fails within three years often comes down to installation precision.
Before you begin any installation, understand your system's requirements. Are you installing a variable refrigerant flow (VRF) system, a traditional chilled water loop, or a direct expansion (DX) setup? Each configuration demands different pump and compressor specifications. Review the equipment nameplate for flow rate (L/min), pressure rating (bar), and power requirements (kW) to ensure your piping and electrical infrastructure can support the equipment.
Pre-Installation Assessment and Planning
Successful installations start long before you touch a wrench. Spend time on site assessment and planning—this investment saves countless hours of troubleshooting later.
Conduct a System Audit
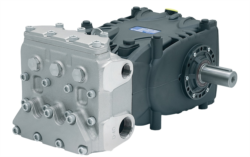
Walk the installation site with your design specifications in hand. Identify where the pump or compressor will mount, trace the complete piping route, and note any obstacles. Singapore's urban density often means tight mechanical rooms, roof-mounted equipment exposed to direct sun, and challenging access paths. Measure doorways, stairwells, and rooftop access points to confirm the equipment can physically reach its installation location. The Pratissoli MW40 high-performance pump weighs 264 kg—you'll need appropriate lifting equipment and a clear path.
Verify Piping and Electrical Infrastructure
Check that existing piping matches your system's pressure rating. Many Singapore buildings were retrofitted over decades; old copper lines rated for 10 bar may not survive connection to a 200 bar system. Similarly, verify electrical supply capacity. The Pratissoli KF30 industrial pump requires 40 kW power input—insufficient electrical service becomes a showstopper.
In Singapore's tropical environment, plan for corrosion protection. Salt air near coastal areas accelerates oxidation. Specify stainless steel or zinc-plated fasteners, and plan for annual inspection protocols from day one.
Document Ambient Conditions
Note the equipment's operating environment. Will the pump or compressor sit in a mechanical room with controlled temperature, or on a roof exposed to 35°C+ sun? Tropical heat reduces compressor efficiency and increases pump cavitation risk. Temperature affects lubricant viscosity, seal performance, and motor bearing life. If your installation location exceeds 40°C ambient temperature, specify cooling fans or relocated equipment.
Installation Procedures: Step-by-Step
Proper installation technique directly impacts system longevity and efficiency. Follow these proven procedures.
1. Prepare the Mounting Foundation
Unstable foundations cause vibration, noise, and accelerated seal wear. For floor-mounted equipment, inspect the concrete for cracks, settling, or moisture. In Singapore's humid environment, moisture in concrete can promote rust on steel mounting feet.
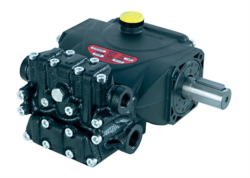
If the foundation is questionable, add a vibration isolation pad rated for the equipment weight. For the Pratissoli SS71153 pump operating at 800 rpm, rubber isolation prevents vibration transmission to building structure and reduces noise in occupied spaces.
Fasten all mounting bolts to the torque specification in the equipment manual. Under-torqued bolts loosen during operation; over-torqued bolts crack castings. Use a calibrated torque wrench—not guesswork.
2. Install Suction and Discharge Piping
Pipe sizing directly affects pump performance. Undersized suction lines cause cavitation (pump cavitation results in noise, vibration, and erosion damage). Oversized discharge lines increase pressure drop and reduce system efficiency.
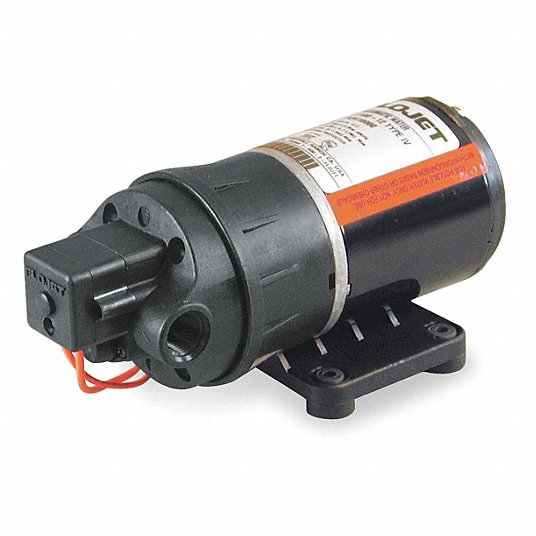
For the Interpump E1D1808 compact gear pump delivering 8 L/min, use ½-inch suction line (maximum 0.5 m/s velocity). For the MW40 pump at 211 L/min, use 1½-inch suction line.
Install suction line strainers with 100-micron screens—coarser screens allow particulates that damage pump internals. Clean all piping before connection; residual welding slag and manufacturing debris destroy gear teeth and seals within hours of operation.
Where possible, avoid elbows on the suction side. If elbows are necessary, use long-radius bends (R ≥ 5D, where D is pipe diameter) rather than standard elbows. Orient the pump below the fluid reservoir to minimize suction head and reduce cavitation risk.
On the discharge side, install a pressure relief valve set 10% above system operating pressure. This protects against overpressure when the system blocks (e.g., a clogged valve). Install a check valve in series with the relief to prevent backflow during shutdowns.
3. Connect Refrigerant Lines (for Compressor Installations)
Refrigerant line connections demand absolute cleanliness. Even trace moisture and air contaminate the system, causing acid formation, compressor burnout, and premature failure.
Before any refrigerant connections, evacuate all lines to 500 microns absolute using a certified vacuum pump—not the system compressor. This removes moisture and non-condensable gases that compromise performance.
Use nitrogen to pressure-test lines at 1.5× the system operating pressure before evacuation. Never use oxygen or compressed air; these create explosion hazards and contaminate the system.
After successful pressure testing and evacuation, connect refrigerant lines using flare fittings. Avoid solder connections on large systems—flare fittings allow service access and prevent contamination from flux residue.
4. Electrical Connection and Grounding
Connect motors using heavy-gauge, color-coded wire to a dedicated disconnect switch. In Singapore, verify that the electrical installer follows SS 638 (Singapore Standard for electrical safety).
For three-phase motors, confirm correct rotation direction before full-load operation. Many HVAC systems operate with reversible compressors; incorrect rotation reduces capacity and increases temperatures, leading to motor burnout.
Ground all equipment frames using a separate ground conductor—not the system piping. System piping grounds create stray current paths that corrode connections and degrade seal performance in compressor crankshaft areas.
5. Bleed Air from System
After piping and electrical connections are complete, bleed trapped air from the system. Water-cooled systems should cycle several minutes with pump running before reaching setpoint, allowing trapped air to escape through float vent valves.
For chilled water systems, run the pump at half-speed if possible (using a VFD) for initial circulation. This allows entrained air to migrate to vents without creating pressure spikes.
Commissioning and Performance Verification
Commissioning separates successful installations from failures. Never skip this phase.
Baseline Performance Testing
With the system running, measure discharge pressure and compare to nameplate specifications. The Interpump ET1C1612 pump operates at 160 bar rated pressure; your gauge reading at design flow should fall within ±5% of this specification.
Measure motor current draw using a clamp meter. Three-phase motors should draw roughly equal current on all phases (within 5%). Imbalanced current indicates electrical problems or cavitation (for pumps).
Measure flow rate if the system has flow meters. If not, calculate flow from pressure drop across a calibrated orifice plate or use temporary inline turbine meters.
In Singapore's humid environment, check vibration using a portable vibration meter. Baseline vibration at commissioning becomes your reference point for detecting degradation during future maintenance.
Pressure and Temperature Logging
Run the system for a minimum 8-hour period, logging pressure and temperature every 15 minutes. Stable readings indicate proper installation. Drifting pressure or temperature suggests:
- Cavitation (pressure drops during operation)
- Refrigerant leaks (temperature rises without load increase)
- Valve blockage (discharge pressure spikes)
Document these baseline readings in the equipment maintenance file. Future technicians will reference these values during troubleshooting.
Final Documentation
Create a commissioning report including:
- Equipment serial numbers and installation date
- Baseline pressure, temperature, and vibration readings
- Electrical specifications (voltage, current, phase balance)
- Piping configuration and valve locations
- Maintenance schedule and contact information
Provide this documentation to the building owner and maintenance team. In Singapore's competitive service market, documentation differentiates premium contractors from commodity installers.
Maintenance During the First 30 Days
The first month of operation is critical for identifying installation defects before they cause catastrophic failure.
Week 1: System Shake-Down
Run the system continuously if possible. Monitor for unusual noise, vibration, or temperature changes. Small issues amplified during extended operation indicate installation problems requiring immediate correction.
Week 2-3: Pressure Testing
With the system stabilized, conduct formal pressure testing with certified gauges. Log readings at full load, partial load (50%), and idle conditions. Pressure should track load predictably; erratic behavior suggests cavitation, leaks, or control problems.
Week 4: Filter and Oil Change
Many pumps and compressors accumulate manufacturing residue during the first 500 operating hours. Change suction strainer elements and compressor oil (if applicable) after the first month. This removes particulates that would otherwise damage internal components.
Conclusion
Installing pumps and compressors correctly requires planning, precision, and verification. Singapore's tropical environment demands particular attention to corrosion protection and thermal management. By following these procedures—from pre-installation assessment through 30-day commissioning—you'll deliver HVAC systems that operate reliably for years.
3G Electric's 35+ years supporting industrial equipment users across Asia means we understand the specific challenges Singapore contractors face. When you need high-performance pumps and compressors backed by technical expertise, we're here to help. Contact our Singapore team to discuss your next installation.