Understanding Burners & Combustion Temperature Control Challenges
Temperature control failures in industrial burners represent one of the most costly operational problems for HVAC contractors and facility managers across Southeast Asia. Unlike ignition failures or flame detection issues, temperature instability often develops gradually, making it difficult to diagnose without systematic troubleshooting.
Drawing on 35+ years of experience as a distributor of industrial combustion equipment, 3G Electric has identified that approximately 40% of burner complaints relate to inconsistent heat output and temperature swings rather than complete system failures. These issues typically stem from three interconnected systems: modulation control mechanisms, fuel delivery regulation, and thermal feedback sensing. Understanding how these components interact is essential for effective diagnosis.
Temperature control problems manifest differently depending on burner type and installation configuration. Two-stage burners may cycle excessively between high and low fire, while modulating burners produce unstable output that cannot maintain setpoint. Oil and dual-fuel systems experience additional complexity due to viscosity-temperature relationships and atomization quality variations. This guide provides diagnostic protocols applicable across these scenarios.
Diagnosing Modulation Control and Temperature Response Failures
Identifying Modulation System Problems
Modulating burners adjust fuel flow continuously to match heat demand, maintaining more stable outlet temperatures than two-stage designs. When modulation fails, you typically observe:
- Temperature swings exceeding ±5°C from setpoint
- Rapid cycling between full fire and reduced fire (hunting)
- Inability to achieve stable low-fire operation below 40% capacity
- Excessive fuel consumption at part-load conditions
- Boiler or system water temperature overshooting setpoint by 10°C or more
Start by verifying the modulation valve response. With the system in automatic mode and stable operation, gradually reduce the room thermostat or system demand setpoint by 3°C. Observe whether the burner flame smoothly reduces in size over 30-60 seconds or drops abruptly to pilot. Abrupt reductions indicate the modulation servo is not receiving proportional control signal from the burner control relay.
For burner control relay diagnostics, the Kromschroder Relay BCU 570WC1F1U0K1-E supports intermittent and continuous pilot modes with modulation capability. If your installation uses this relay, verify the control voltage signal between terminals 5 and 6 (typical 0-10V DC signal proportional to demand). A multimeter reading that remains constant at 10V regardless of demand setpoint indicates the control relay is not receiving feedback from your building automation system or thermostat.
Pressure Drop Analysis Across Modulation Valves
Fuel pressure must remain stable as modulation valves restrict flow. Take pressure readings at three points:
1. Main fuel supply inlet (upstream of all burner controls)
2. Modulation valve outlet (downstream of proportional valve)
3. Burner nozzle or main fuel manifold
For oil burners operating at 8-12 bar, acceptable pressure drop across a properly functioning modulation valve is 1-2 bar at full fire capacity. If pressure drop exceeds 3 bar or fluctuates by more than 0.5 bar as the valve modulates, internal valve erosion or carbon buildup is restricting flow.
Gas burners typically operate at 20-40 mbar inlet pressure. Pressure drop should not exceed 5 mbar during modulation. Greater drops suggest valve stiction or internal restrictions. In Southeast Asia's high-humidity coastal environments, moisture ingress into gas pressure regulators is common—inspect the regulator drain plug for water accumulation monthly.
Temperature Sensor and Signal Conditioning
Many temperature control failures originate in the outlet temperature sensor circuit, not the burner itself. The sensor signal must pass through multiple components before reaching the control relay: sensor → signal conditioner → relay input → proportional signal output.
Disconnect the temperature sensor (typically a 100 Ω Pt100 RTD or 4-20 mA transmitter) at the control relay terminal block. Using an ohmmeter, measure resistance at the sensor terminals. A 100 Ω Pt100 sensor at 20°C should read exactly 100.39 Ω (tolerance ±0.3 Ω). Readings outside this range indicate sensor failure or corrosion in the thermowell.
If the sensor measures correctly, apply an external 4-20 mA signal generator to the relay input terminals (if your system uses transmitter-based temperature feedback). Gradually increase the signal from 4 mA to 20 mA while observing the burner modulation response. The flame should smoothly transition from minimum to maximum fire. Erratic or stepped responses indicate filtering problems or proportional valve hysteresis.
For direct RTD installations, ensure proper signal lead compensation. Three-wire RTD installations (common in Southeast Asia) must use matched copper lead gauge throughout the sensor circuit. Mismatched leads create temperature measurement errors of 2-5°C depending on ambient conditions and lead length.
Addressing Fuel Supply Stability and Pressure Regulation Issues
Fuel Pressure Fluctuation Root Causes
Inconsistent heat output frequently traces to fuel pressure variations of ±1-3 bar that occur over seconds to minutes. These fluctuations are distinct from the expected modulation pressure changes and indicate supply-side problems.
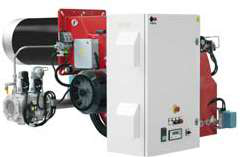
In dual-fuel installations using the FBR KN 1300/M TL EL heavy oil burner, pressure fluctuation severity depends on fuel temperature. Heavy oil viscosity at 40°C should be 8-16 cSt; if ambient or stored fuel exceeds 50°C (common in Southeast Asia), viscosity drops to 5-7 cSt, causing pressure regulator hunting. The regulator bypass valve opens and closes rapidly, creating the observed oscillation.
Implement fuel temperature monitoring if your installation lacks it. Install a thermowell-mounted temperature sensor in the main fuel line upstream of the pressure regulator. Maintain fuel temperature between 38-45°C through:
- Insulating fuel supply lines in air-handling plenums
- Installing immersion heaters in fuel tanks if ambient temperature drops below 10°C
- Draining water from fuel filter-separator bowls daily in humid climates
For gas burners, fluctuating supply pressure often indicates regulator diaphragm degradation. The Kromschroder Pressure switch DG 50U/6 serves as an excellent diagnostic tool. Connect a secondary pressure gauge at the regulator outlet (after the safety shutoff valve). If gauge reading varies ±2 mbar while the regulator inlet pressure remains stable, diaphragm failure is occurring—replacement is required.
Pump and Delivery System Diagnostics
Oil burner heating systems depend on constant-displacement fuel pumps (typically 0.5-1.2 gal/min at 1750 RPM). Declining heat output over 4-8 weeks suggests progressive pump wear or suction line obstruction.
Disconnect the fuel pump discharge line at the pressure regulator inlet. Place the line in a calibrated container and operate the pump for exactly 60 seconds at full fire (electrical input voltage 230V AC). Oil flow should meet the pump nameplate rating ±10%. Flow below rated capacity indicates:
- Clogged suction strainer (first check point)
- Air leaks in suction line creating cavitation
- Pump internal wear from abrasive fuel contamination
- Incorrect pump motor speed due to belt slippage
Fuel contamination is endemic in Southeast Asia due to high ambient moisture. Implement daily filter cartridge inspection and monthly water drain procedures. If the burner operates more than 8 hours daily, increase fuel system maintenance frequency by 50%.
Thermal Stability Optimization and System Integration
Combustion Air Control and Temperature Response
Temperature overshoot (where outlet temperature exceeds setpoint by 8-15°C before modulation corrects) indicates combustion air damper response lag. Many HVAC contractors overlook air damper timing, focusing only on fuel control.
When demand increases, the control signal activates the fuel valve first, with the air damper opening 2-5 seconds later. This transient imbalance causes temporary rich combustion and temperature spike. Worse, if the air damper is sticking or responding slowly, fuel and air remain mismatched throughout operation.
Verify air damper operation by disconnecting the actuator linkage and manually opening the damper fully. Listen for mechanical resistance or grinding sounds. If present, damper blade guides require cleaning—carbon and dust accumulation is severe in Southeast Asian industrial environments. Close the damper fully and measure opening force; it should require less than 5 Nm of manual torque. Excessive resistance indicates bearing corrosion or blade warping.
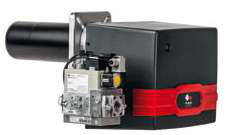
For burners with the FBR GAS XP 60/2 CE TC EVO specification, the integrated air damper actuator must be synchronized with gas valve response timing. Most modern burner controls allow adjustment of air damper lead/lag timing through menu settings (typically 0-10 second offset). If your system oscillates around setpoint, reduce air damper lead time by 1-2 seconds and verify stability over a 30-minute run cycle.
Control Relay Interaction with Modulation Systems
The Siemens Relay LFL 1.622 provides coordinated gas/oil burner control with proportional modulation output. This relay accepts multiple input signals: demand signal (0-10V), flame signal (UV or ionization), and safety interlocks. The proportional output (terminal block varies by installation) drives the modulation valve.
Temperature instability often results from incorrect relay configuration rather than hardware failure. Verify the following settings in the relay control logic:
1. Modulation curve type: Linear vs. adaptive. Linear modulation assumes constant heat output per valve position; adaptive accounts for system hysteresis. For facilities with variable load patterns, adaptive curve reduces temperature swings by 40-60%.
2. Proportional band width: Typically 5-15°C. This defines the temperature range over which modulation operates. Too narrow a band (2°C) causes rapid cycling; too wide (20°C) creates sluggish response. Default 8°C works for most installations.
3. Dead band: Minimum valve position to maintain flame (typically 15-25% fire). If set too high, the burner cannot modulate below 25% capacity, forcing cycling.
Access these settings through the relay's integrated display or via BACnet/Modbus gateway if connected to your building automation system. Document your current settings before adjustment—many Southeast Asian installations operate with factory defaults that are suboptimal for local conditions.
Seasonal and Ambient Temperature Compensation
Southeast Asian facilities experience dramatic seasonal temperature swings: coastal regions shift 15-20°C between dry and monsoon seasons, affecting both fuel properties and system response characteristics.
Implement ambient temperature compensation in your burner control strategy. When outdoor temperature drops 5°C, fuel viscosity and flame stability characteristics change, requiring slightly higher modulation valve position to achieve the same heat output. Conversely, during hot seasons, fuel atomization improves, and the same valve position produces excess heat.
Many relay models support OAT (Outdoor Air Temperature) compensation. If your facility has outdoor temperature sensors, connect them to the control relay input. The relay adjusts proportional modulation signal automatically—a feature that reduces temperature swings by 25-35% compared to fixed setpoint control.
For installations without automation system integration, establish a quarterly maintenance schedule: adjust proportional band width and dead band by ±2% at each seasonal transition. Document changes in a maintenance log for future reference.
Systematic Troubleshooting Protocol for Temperature Control Issues
Step 1: Baseline Data Collection (30 minutes)
Document operating conditions before any adjustments:
- Steady-state outlet temperature and setpoint differential
- Burner firing rate (as % of max capacity, typically shown on control relay)
- Fuel pressure at three measurement points
- Fuel temperature
- Combustion air temperature (if available)
- Cycle time (minutes to complete one full fire cycle)
Examine without disassembly:
- Fuel lines for crimps, leaks, or corrosion
- Air damper linkage for binding or corrosion
- Temperature sensor thermowell for sediment or corrosion
- Control relay display for error codes or low battery warning
- Disconnect temperature sensor; measure resistance
- Apply external signal to relay input; observe modulation response
- Measure fuel pressure at three points; compare to nameplate specs
- If equipped with differential pressure switch, verify closure during operation
With system running:
- Increase setpoint by 5°C; measure response time to stable outlet temp
- Reduce setpoint by 5°C; measure response time and check for overshoot
- Observe flame color and size during modulation (should be smooth, not stepped)
- Listen for unusual cycling patterns or solenoid valve chatter
Based on findings:
- If modulation response is slow: decrease proportional band by 2°C
- If temperature oscillates: increase proportional band by 2°C
- If pressure fluctuates: inspect/replace pressure regulator or fuel pump
- If sensor signal is unstable: clean RTD thermowell or replace sensor
After corrections, log temperature data at 15-minute intervals. Calculate mean outlet temperature deviation from setpoint. Target is ±2°C for modulating burners, ±3°C for two-stage units. If deviation exceeds these values, escalate to Step 4 diagnostics or contact 3G Electric technical support.
With over 35 years of experience distributing industrial heating equipment throughout Southeast Asia, 3G Electric understands the unique environmental and operational challenges your facilities face. Our technical team is available to support complex troubleshooting scenarios involving Burners & Combustion control systems, whether you're diagnosing pressure issues, modulation failures, or integration problems with modern building automation systems.